Events

Managing events
Managing events
To manage your events once created, go to Events > Management.
On this page you will be able to view and sort your events by different criteria.
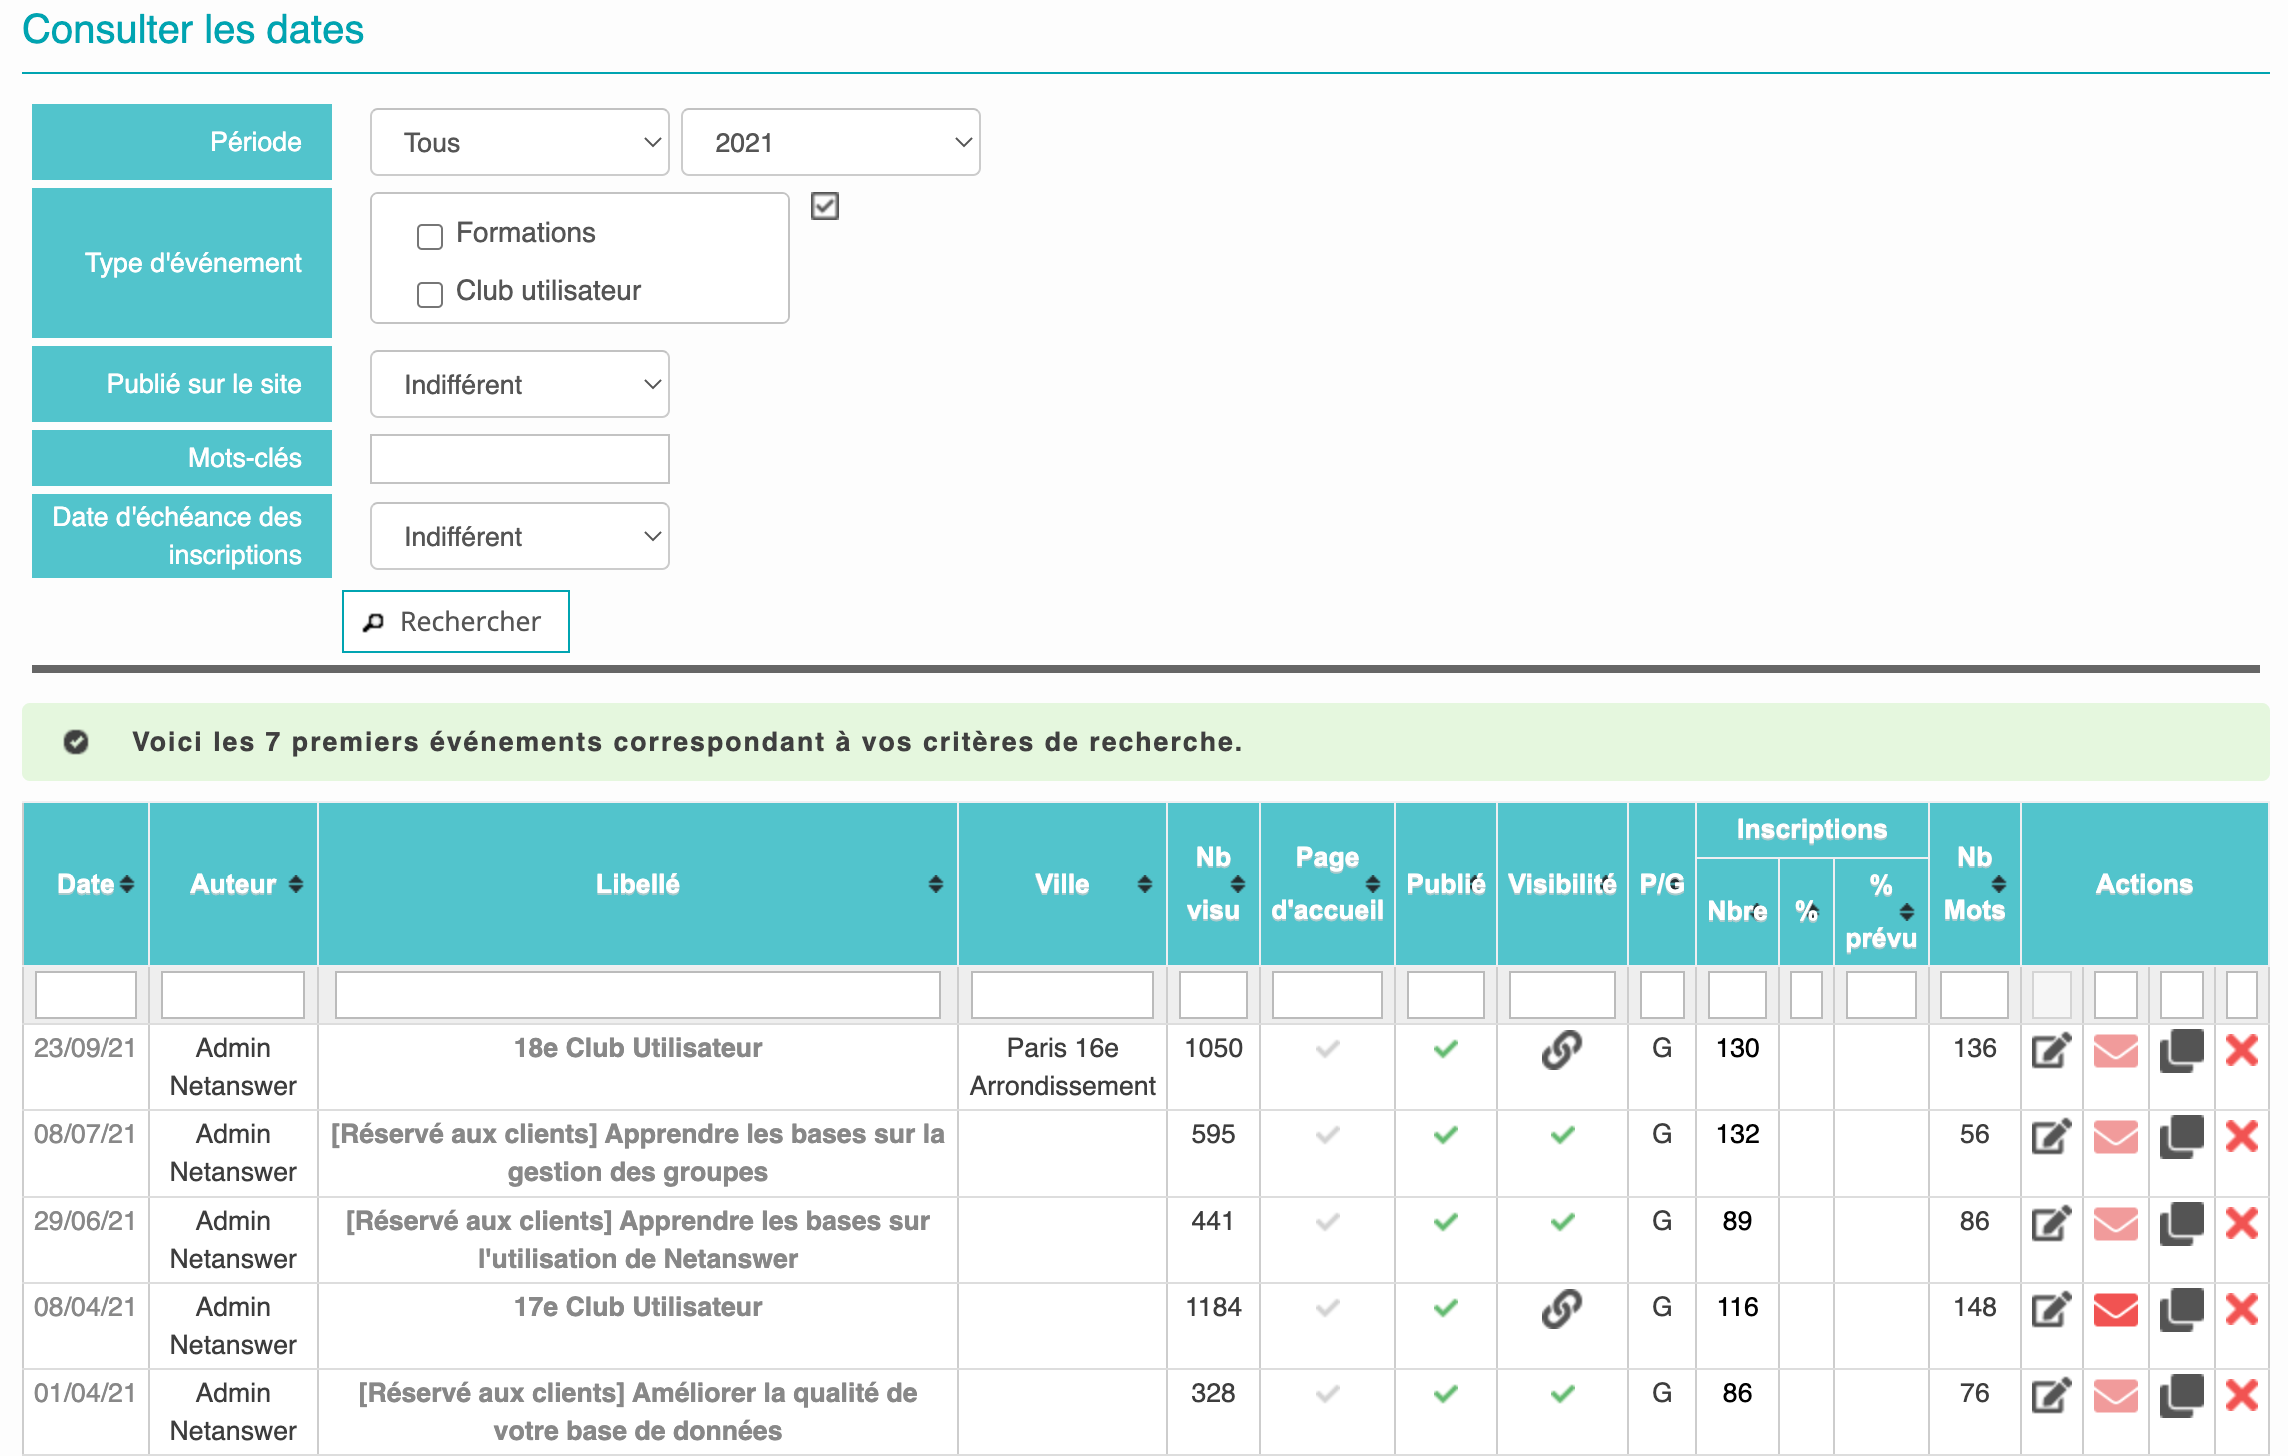
Each row of the table has an event on which you can perform different actions:

Depending on your graphic charter, you may or may not be able to activate the display of your event on the "Home Page" or in the "Carousel".
Similiarly, you can choose to publish the event (or not) by clicking on the icon in the corresponding column.

If you have the "Notifications" option, you can click on this icon to access the menu for sending mobile notifications. This icon becomes increasingly red as you send notifications.

To edit the event

To send an email to members invited to the event

To duplicate the event

To delete the event.
Manage event registrations
You can access this page by clicking on Event> Management and then on the edit icon. Then go to the "Registrations" tab
Add one or more entries
Click on the "Add a Listing" button.
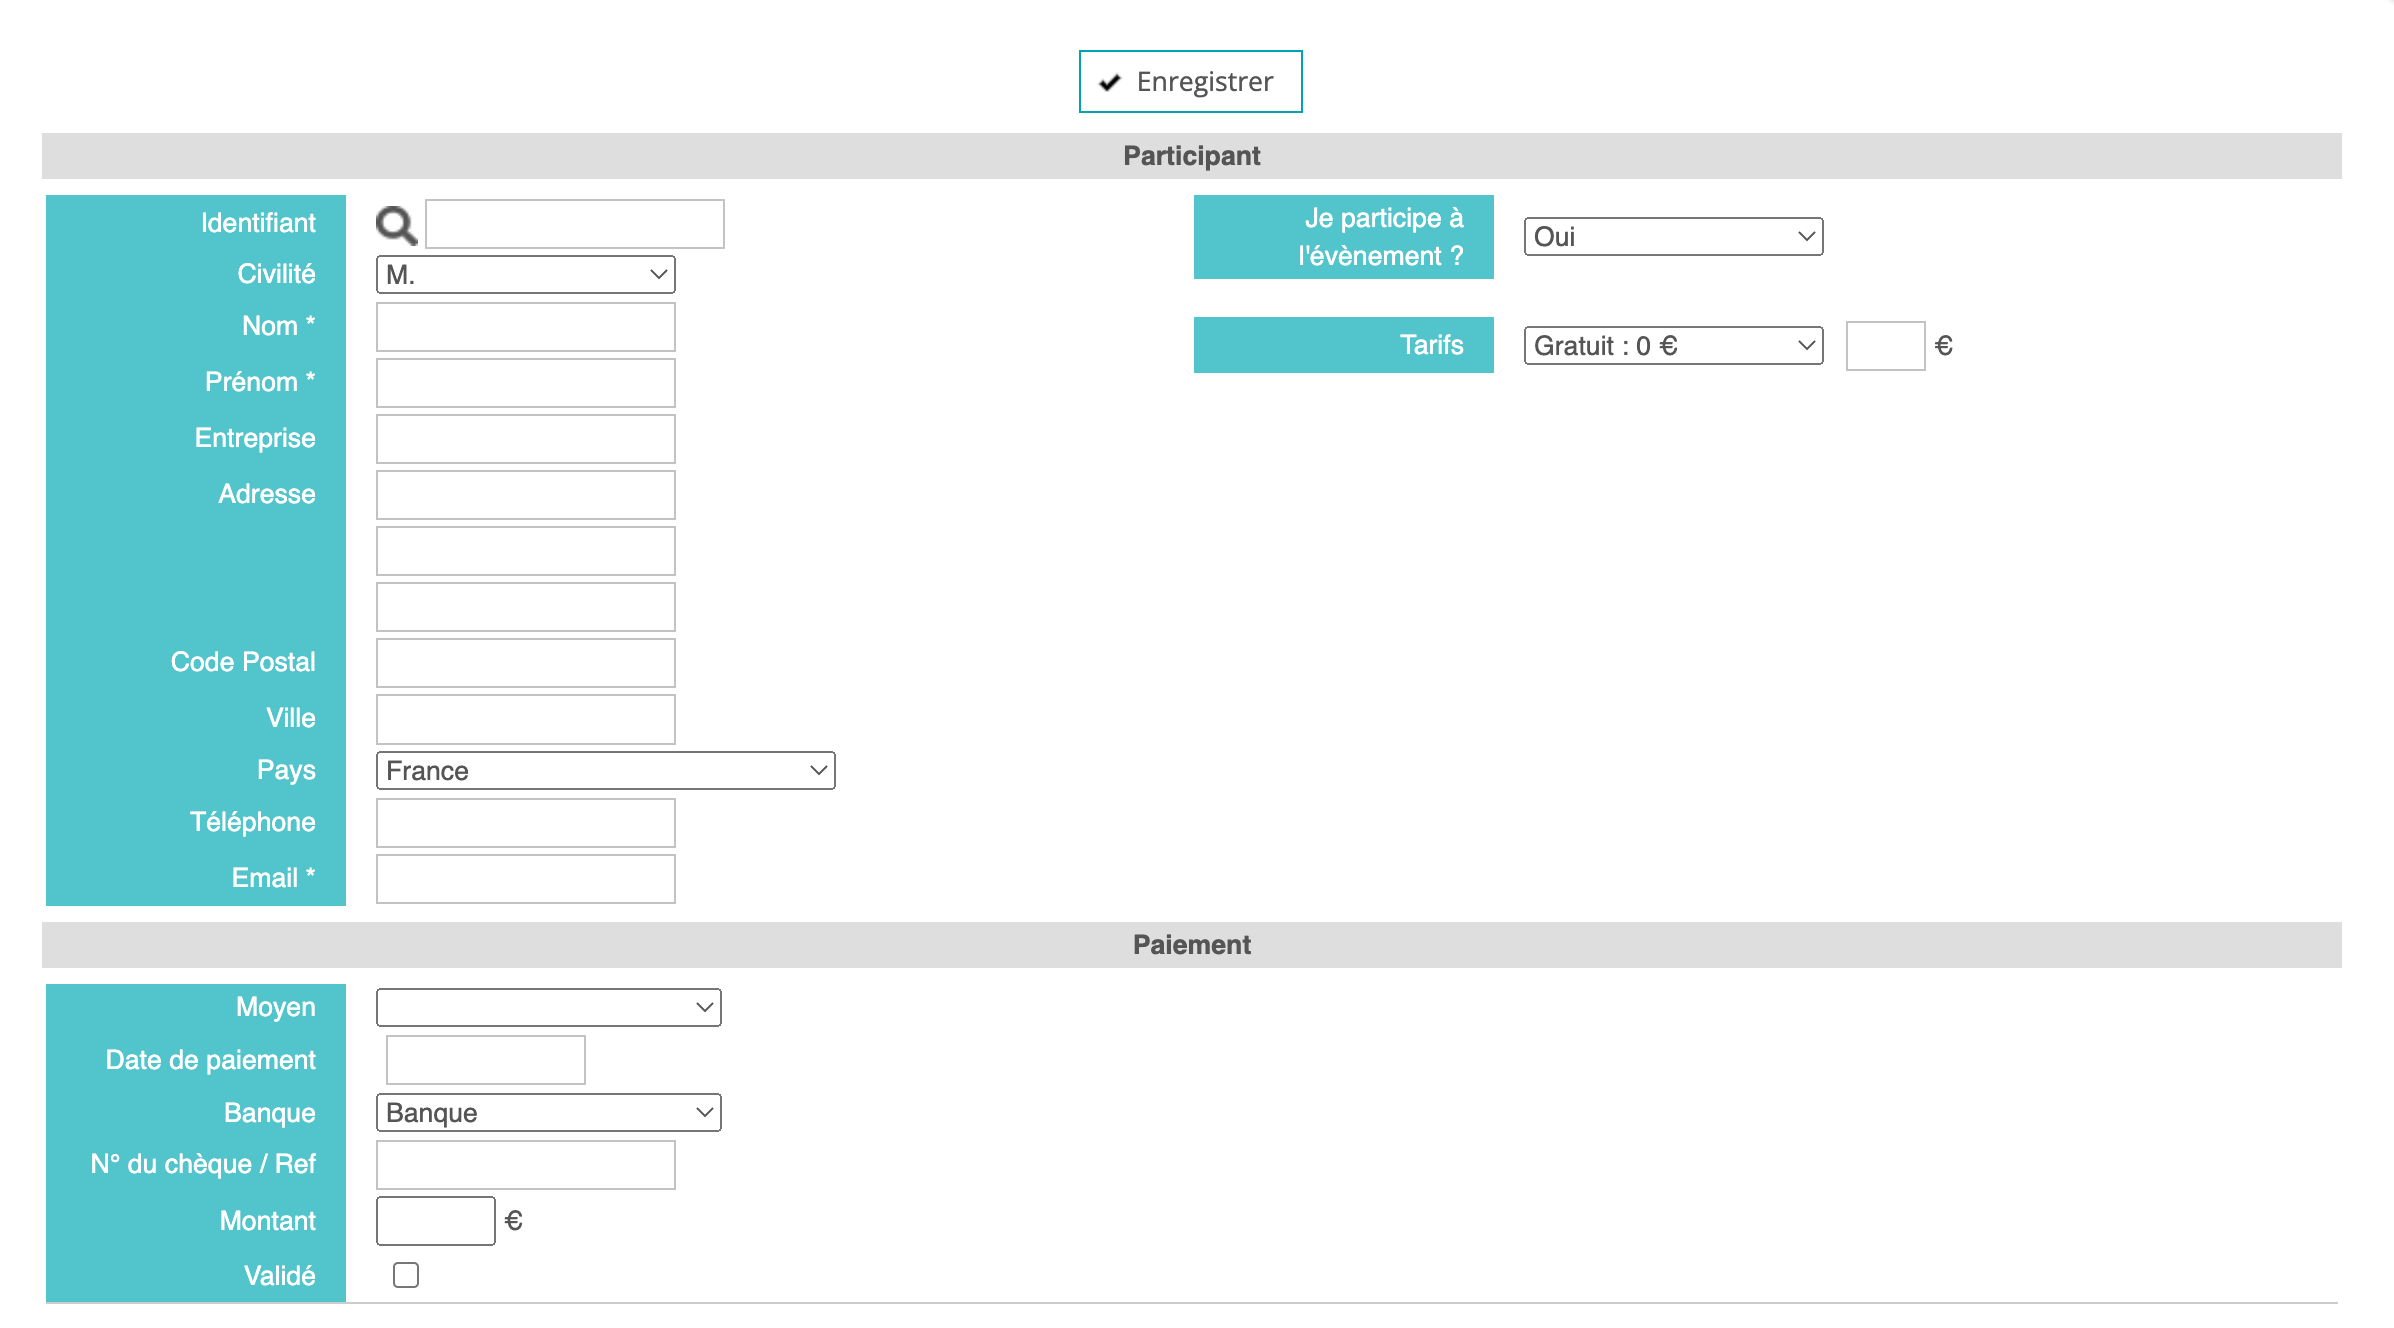
In this window you can add a participant and any accompanying persons.

You can search for a member of your database to import their details directly by clicking on this icon.
Then define the means, amounts, and status of payments, as well as the billing address and any comments that are only readable by administrators.
Manage registrants

When your members register for events from outside, you can link them to your database records by clicking on this icon.
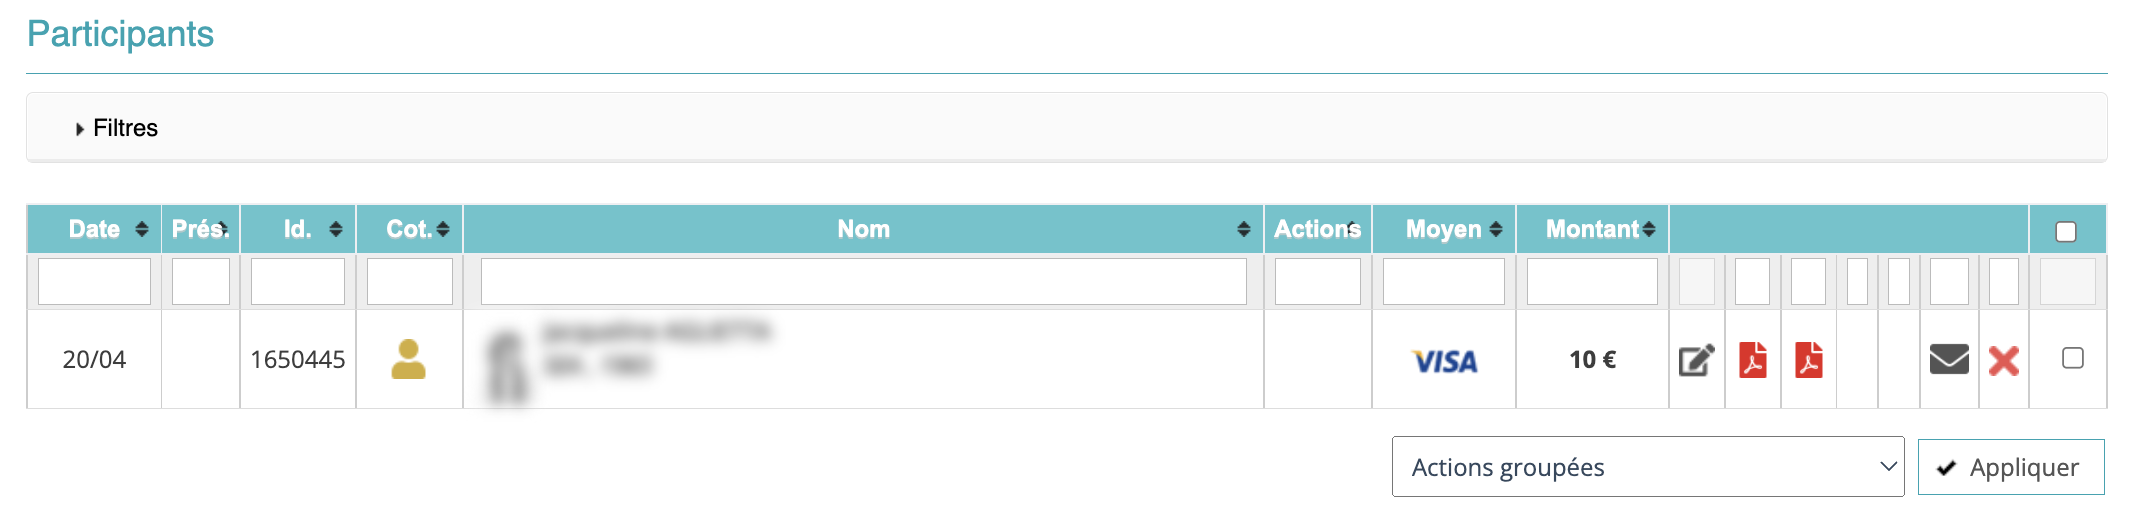

Click on the "Present" column to indicate the attendance of the person or click again to indicate their absence

Click on the name to see the person's file

If you have set up a satisfaction questionnaire, you can display the answers of a specific member

To complete the questionnaire for that person, for example, if you have to enter printed questionnaires he/she/they have filled out

To resend the satisfaction questionnaire to this person

To change registration details

To display the registration confirmation and the person's receipt

To send a confirmation email

To delete the person's registration
To indicate the attendance or absence of several members, you can select several rows by using the checkboxes on the right of the table and clicking on "These participants attended" or "These participants did not attended".
Manage event lists and documents

You can access this page by clicking on Events > Management and then this icon on the relevant event.
Document editing
Many documents are editable from the event page:
- Registration receipts
- Registration confirmations
- Guest badges
- Riders/riders with the names of the participants
- Your event's sign-up sheet
- Photo directory
- The sign-up sheet
You can set the appearance of some of these documents in Events > Settings.
Export of participants

You can export the participants of your event as a "List" in PDF or via an Excel file by clicking on "Excel List".
Emailing participants

You can send an e-mail to the participants by clicking on "Send an e-mail to participants".
You can send registration confirmations to all your registrants by clicking on "Send registration confirmations".
You can choose to send the satisfaction questionnaire, if you have set one up, to all registrants or to those present only by clicking on the associated buttons.


No comment
Log in to post comment. Log in.