News

Why and how to switch to the new Google Analytics (GA4)?
As of July 1, 2023, Universal Analytics (old version of Google Analytics) will stop processing new calls to your website. It will still be possible to access previously collected data until December 31, 2023 .
After this date, they will be permanently destroyed. We encourage you to :
- Switch now to the new version of Google Analytics: Google Analytics 4, in order to have a usable history on your data.
- Download your historical data to Universal Analytics to continue to use it after December 31, 2023. (This data cannot be reinjected into Google Analytics 4).
We can assist you in uploading your data and creating interactive reports (on Google Data Studio) to continue to use your Universal Analytics data. Do not hesitate to contact us.
In this article, we will see together how to migrate to Google Analytics 4. We will guide you step by step. Let's go!
1. Create a GA4 property from your Universal Analytics account
💡 "In Google Analytics, a property corresponds to a website, mobile app... associated with a unique tracking code. A Google Analytics account can contain one or more properties."
📌 NB: you need "Editor" rights to make this change.
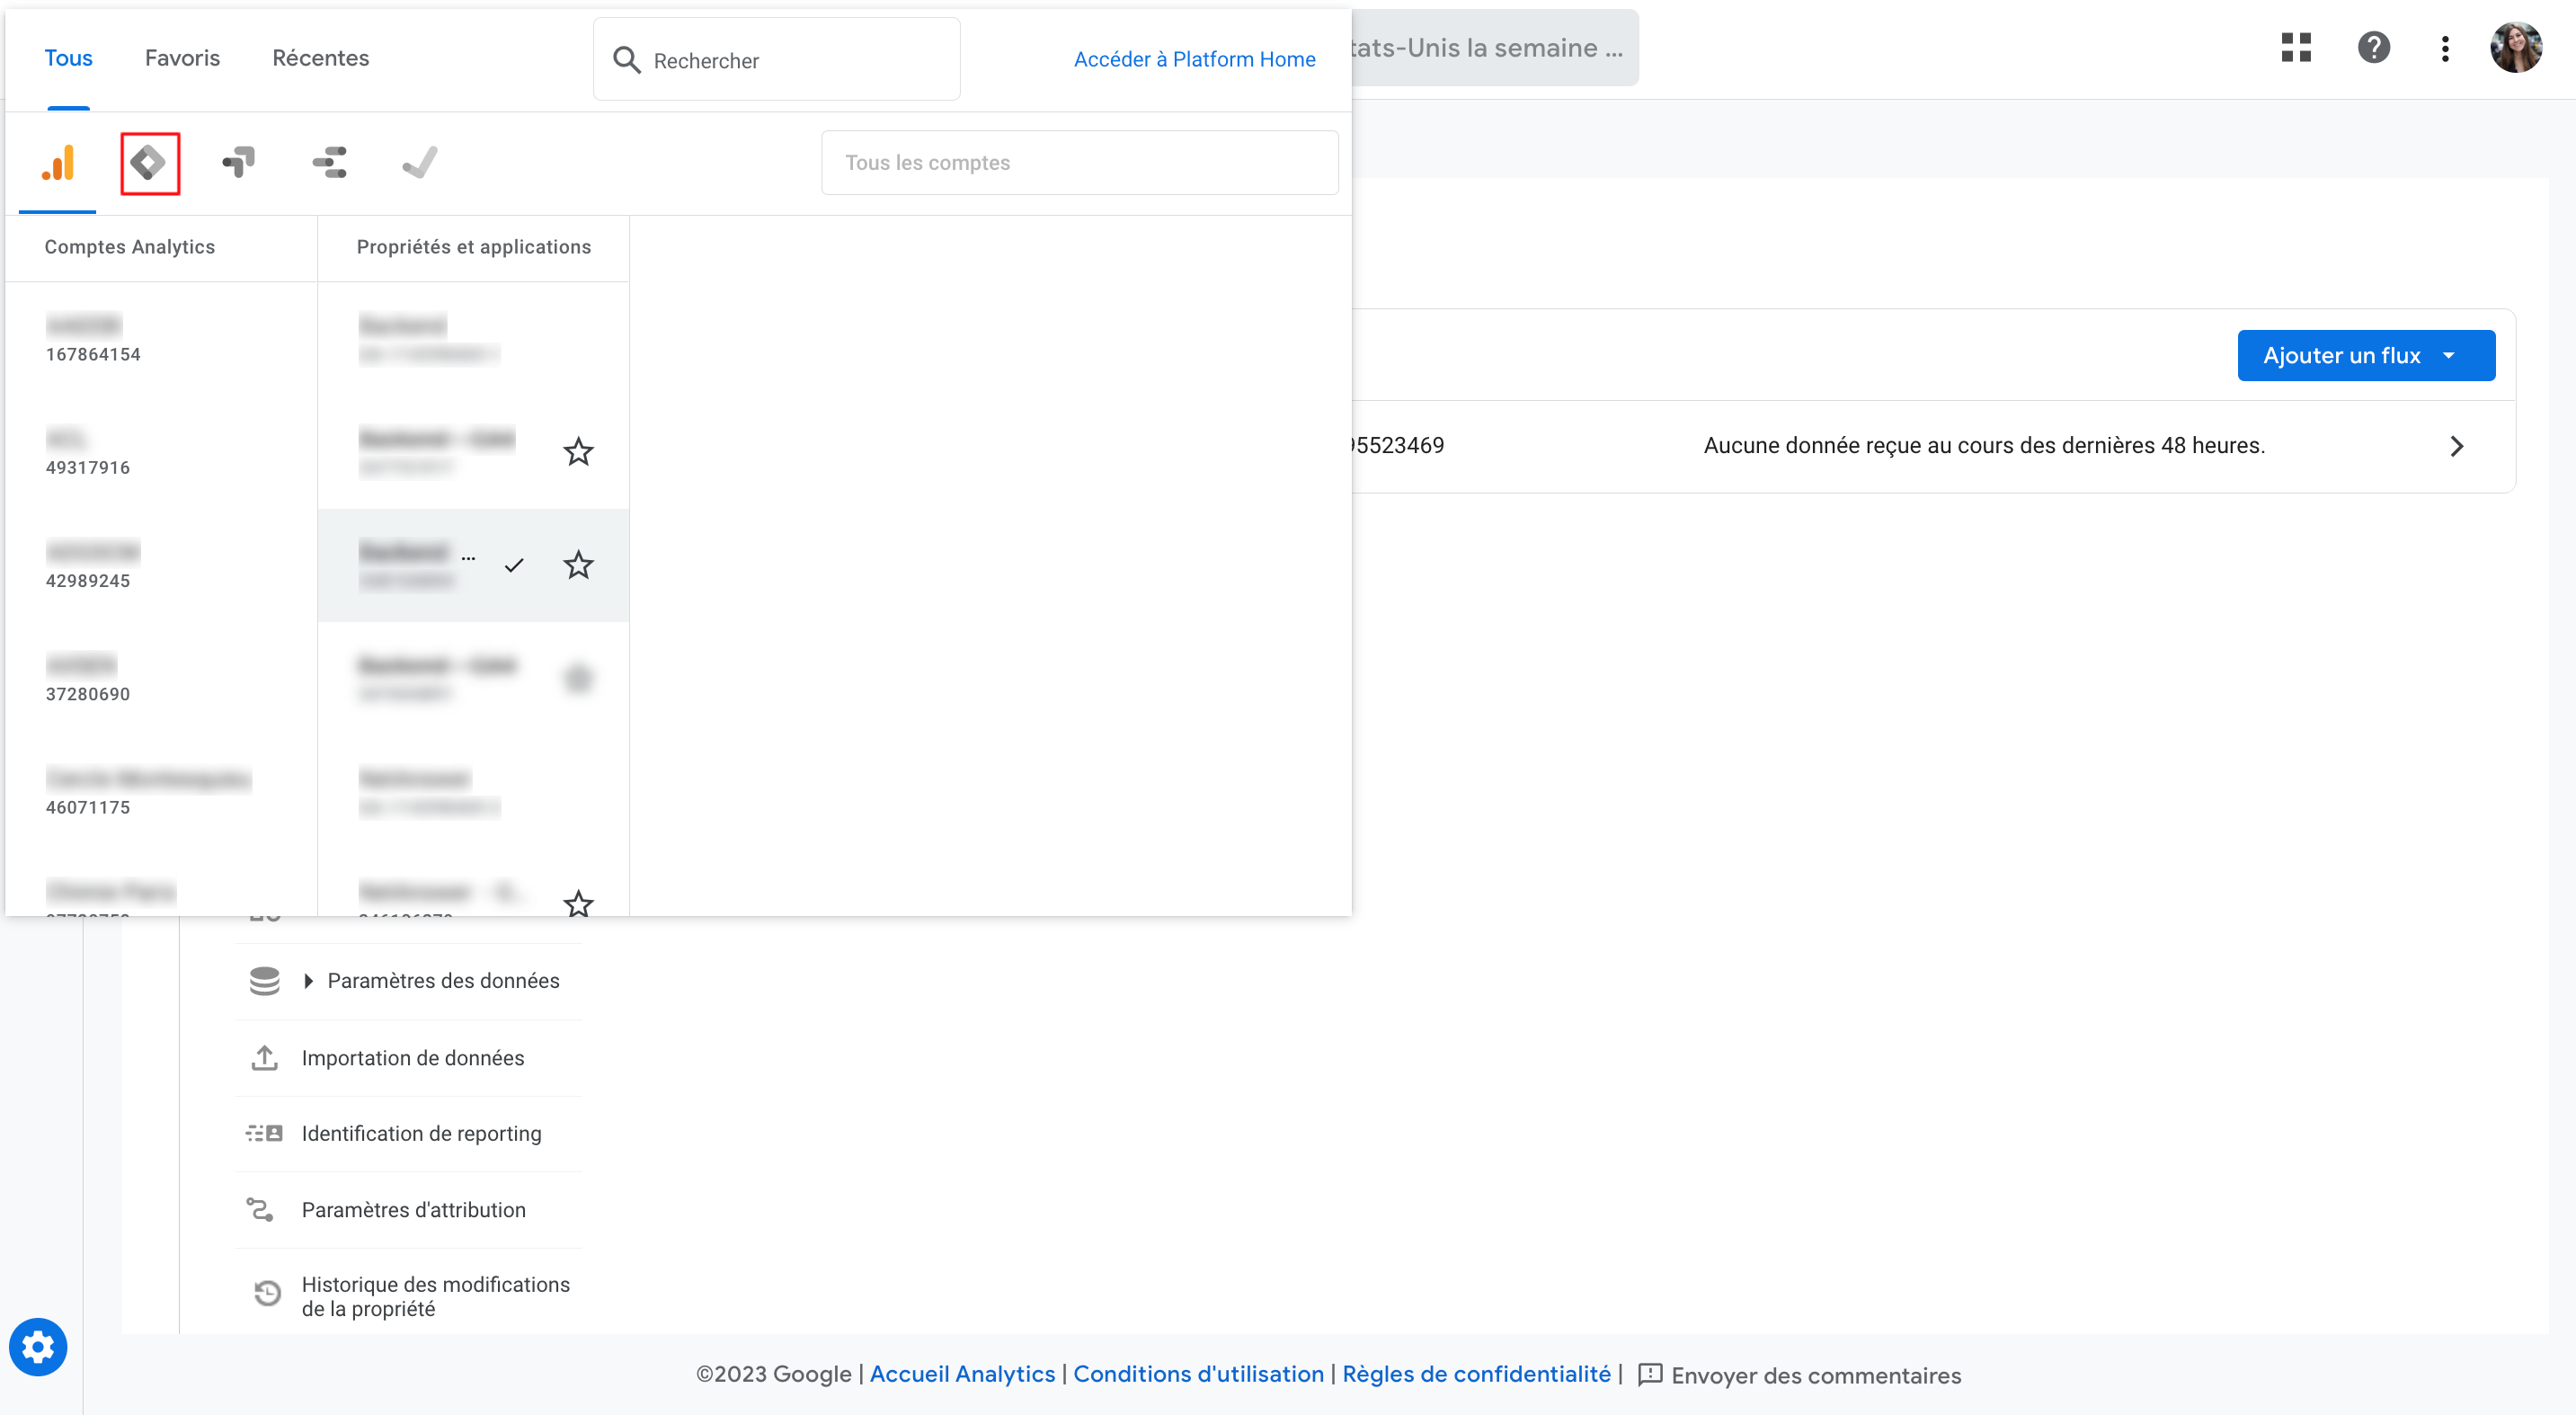
Go to your Google Analytics Account and click on : Settings (1) -> GA4 Configuration Wizard (2) -> Start (3)
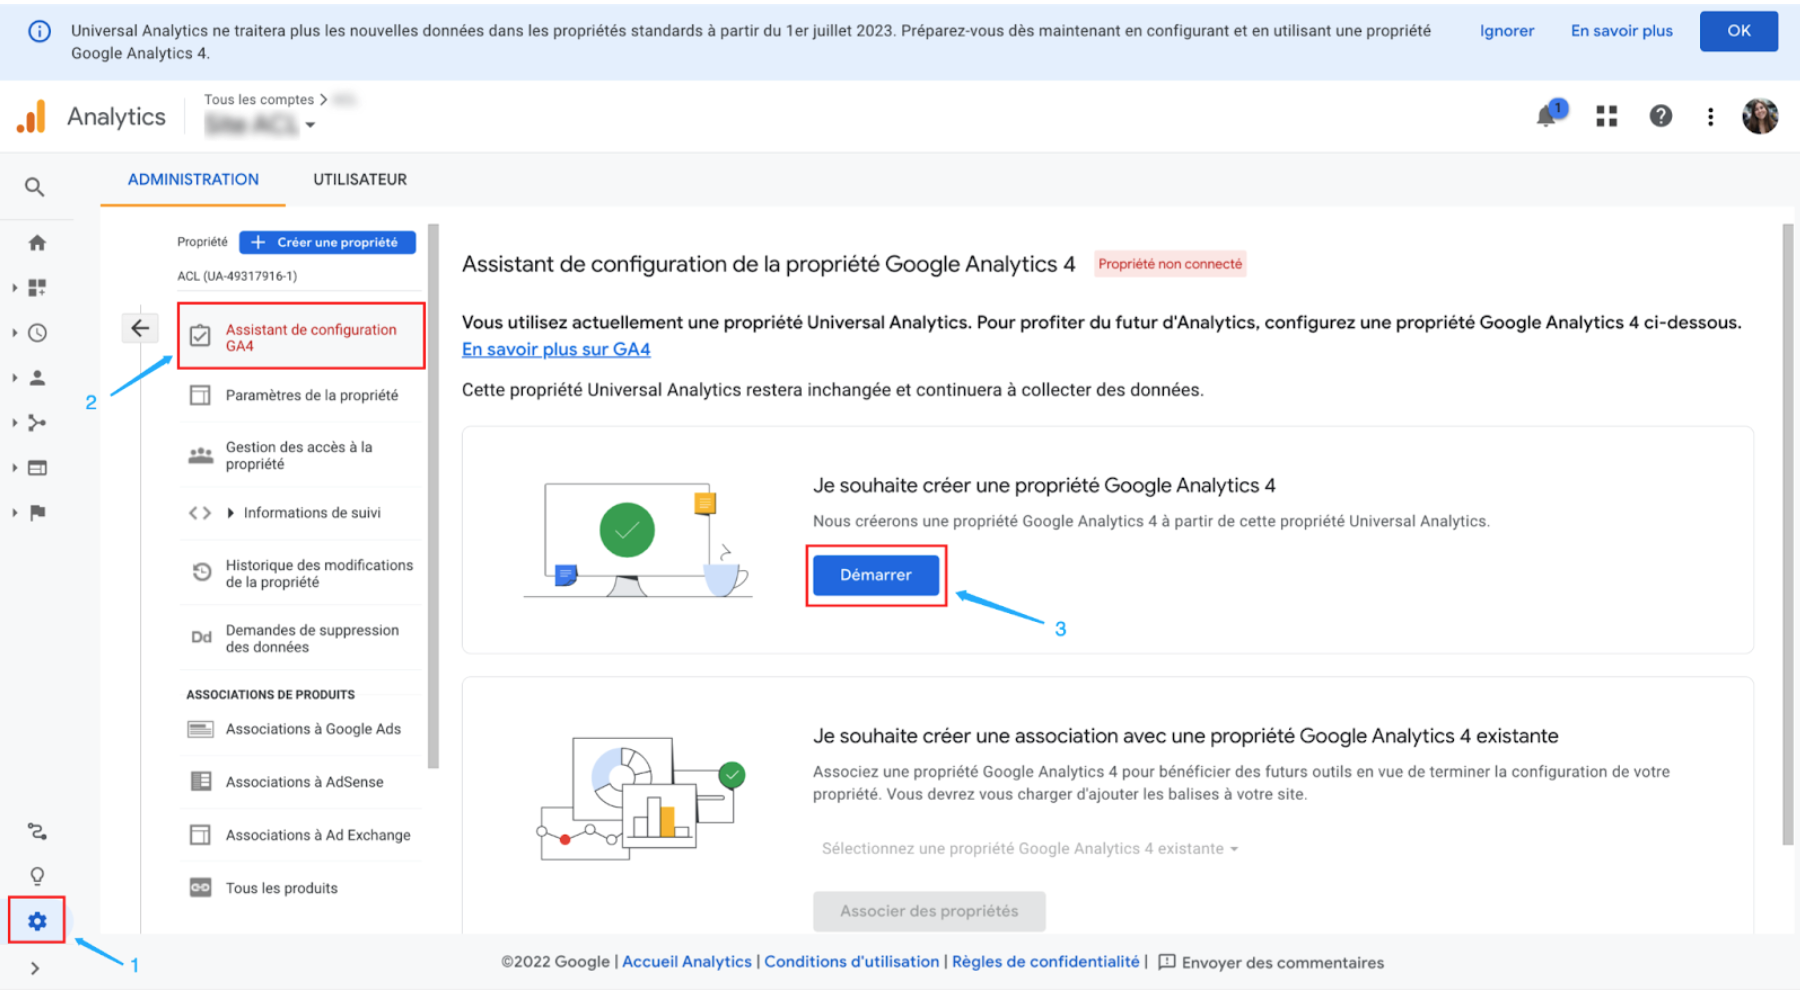
A pop-up window opens: "Create a Google Analytics 4 property", click on "Create and continue".

A new page opens: Configure a Google tag.
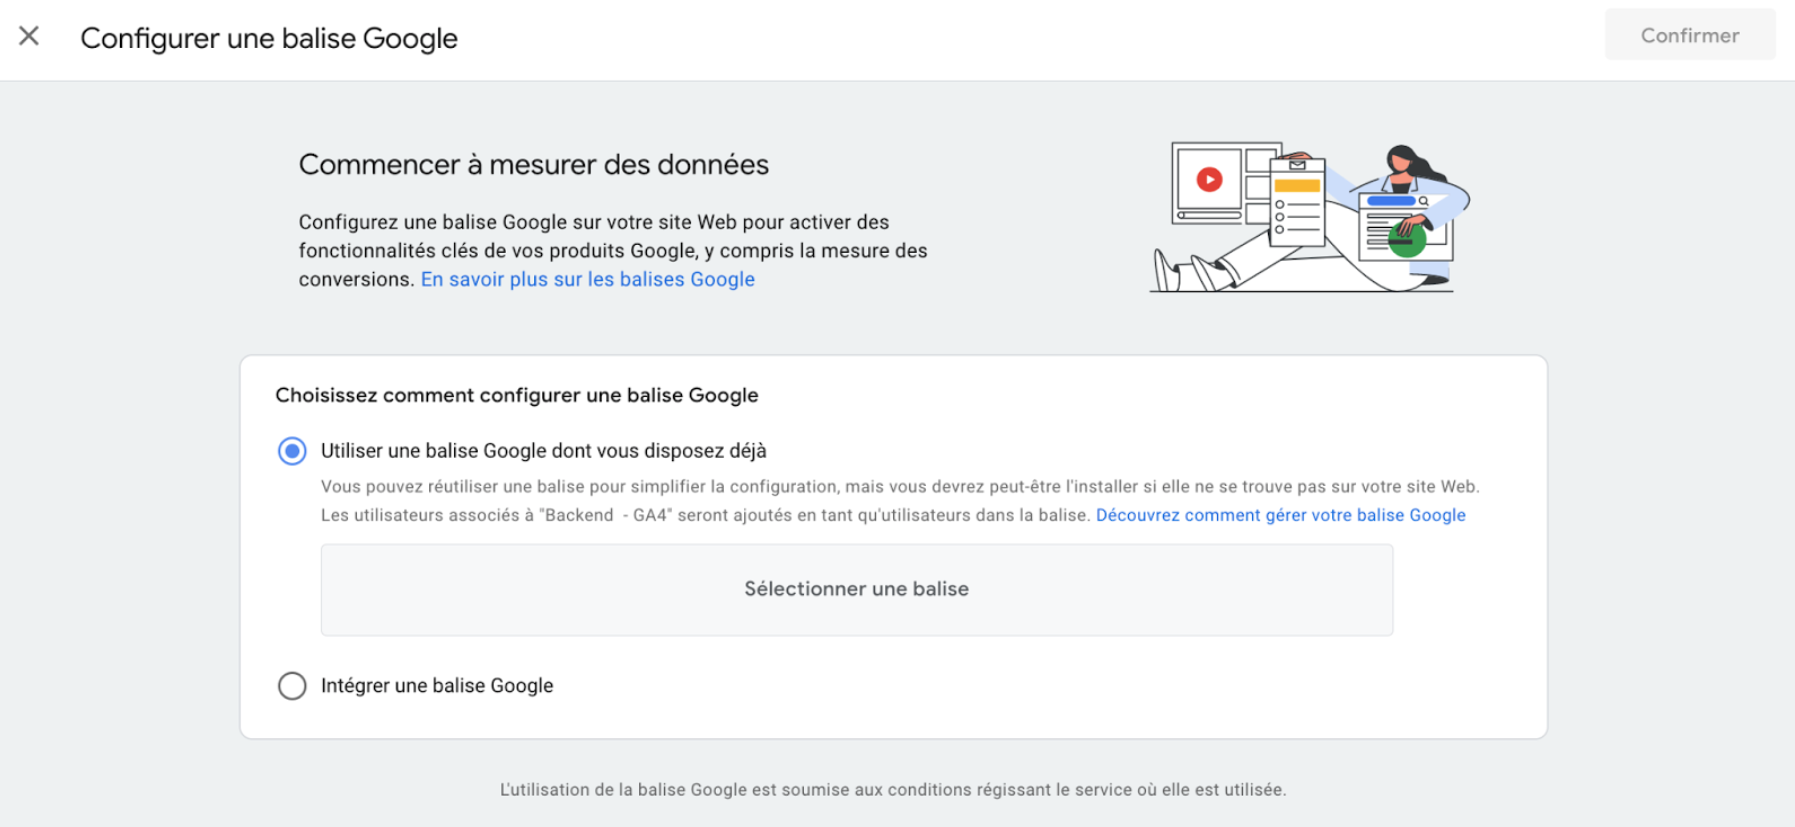
- If a Google tag is detected on your site, it will be listed under the section: "Use a Google tag you already have".
- If the tag is not detected, click on "Integrate a Google tag" then click on "Next".
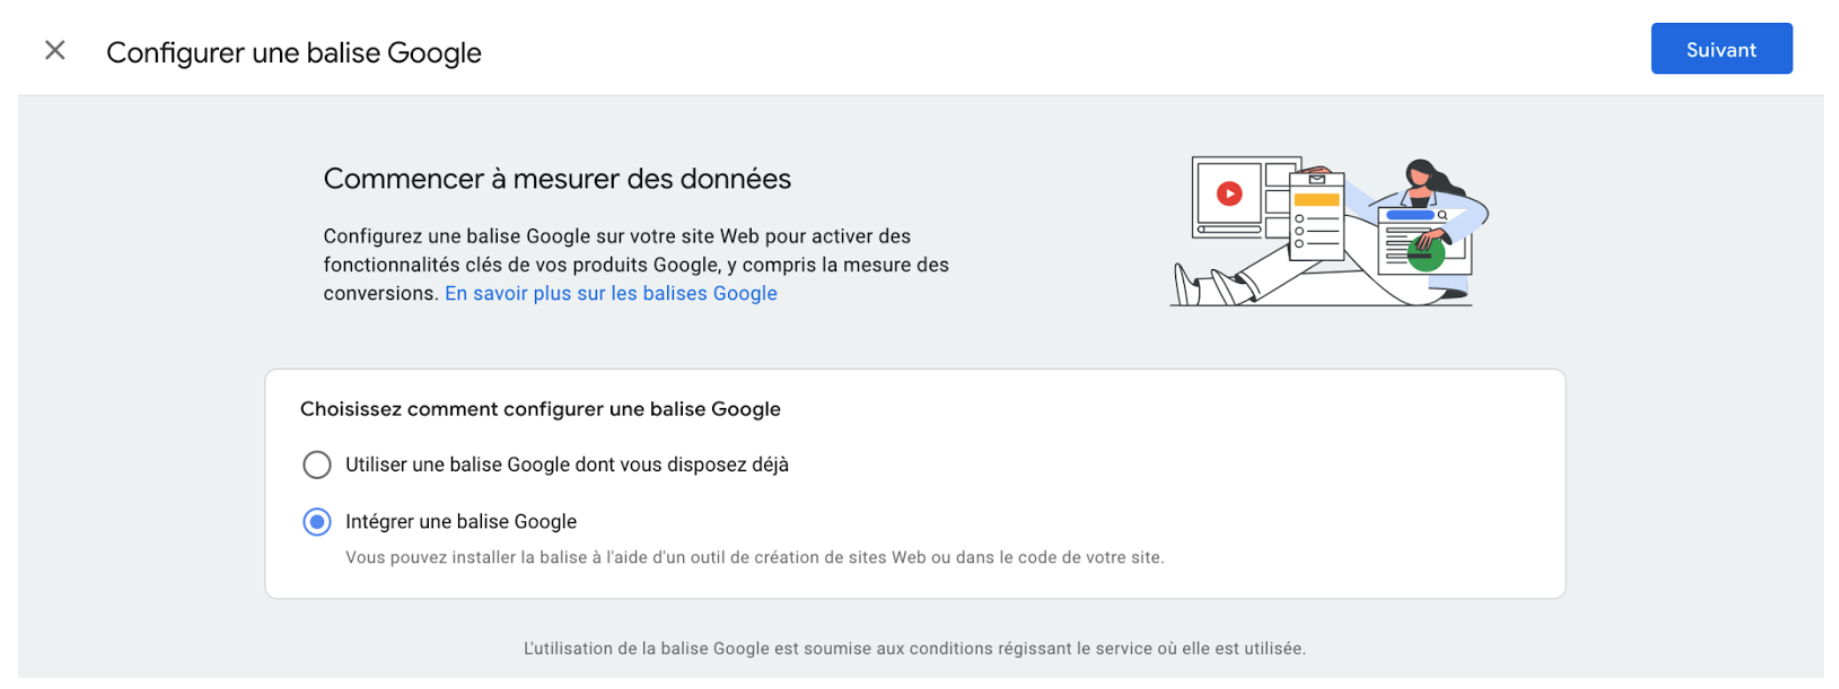
Skip the step: "Integration instructions" by clicking on OK (you don't have to do anything at this point).

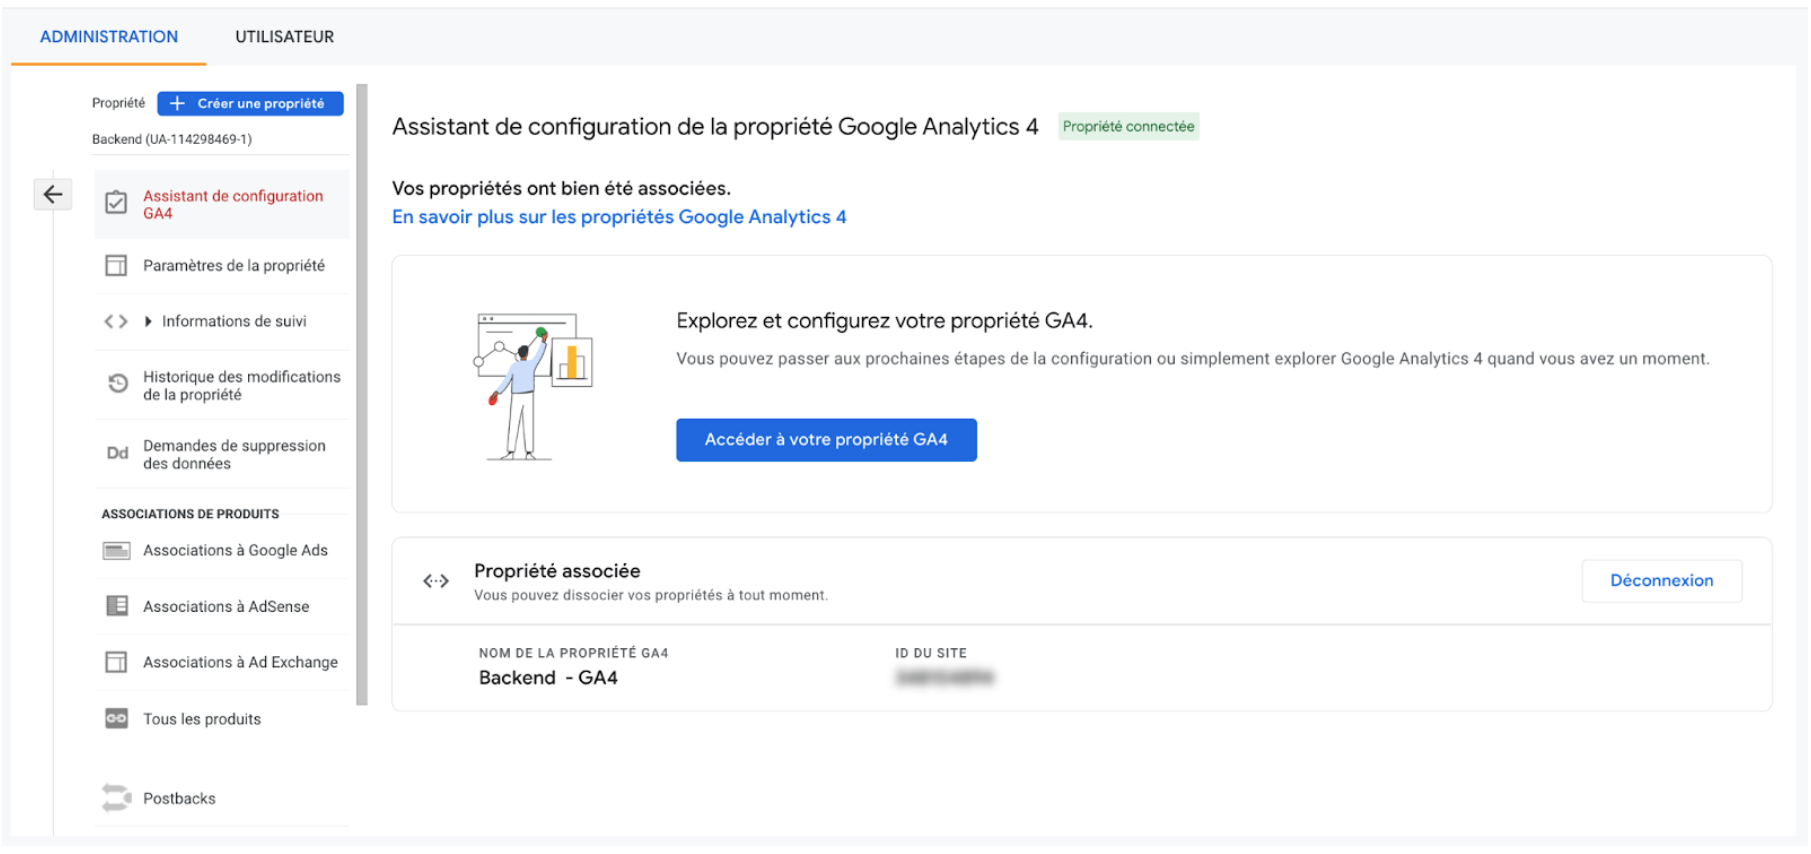
It's done! Your new Google Analytics 4 property is created, but the setup doesn't stop there. You now need to enable this property to collect data. To do this, you will need to install the tag on your website.
2. Install the Google Analytics 4 tag for data collection
You have two possible solutions to install the Google Analytics 4 tag:
- The simplest: replace your current tag (UA-XXXXXXXXX-X) with the new one (G-XXXXXXXXXX). With this method, the data will only go back to your new property (Google Analytics 4). Your old property (Universal Analytics), will not be active anymore.
- The most advanced: use Google Tag Manager to install the tag. Useful if you want to have data going back to your 2 properties (Universal Analytics and Google Analytics 4) and if you want to create and track custom events (click on a button, click on a menu item...)
2.1 Replace your old tag (Universal Analytics) with the new one
If you have chosen the 2nd solution ("The most advanced"), ignore this section and go directly to 2.2
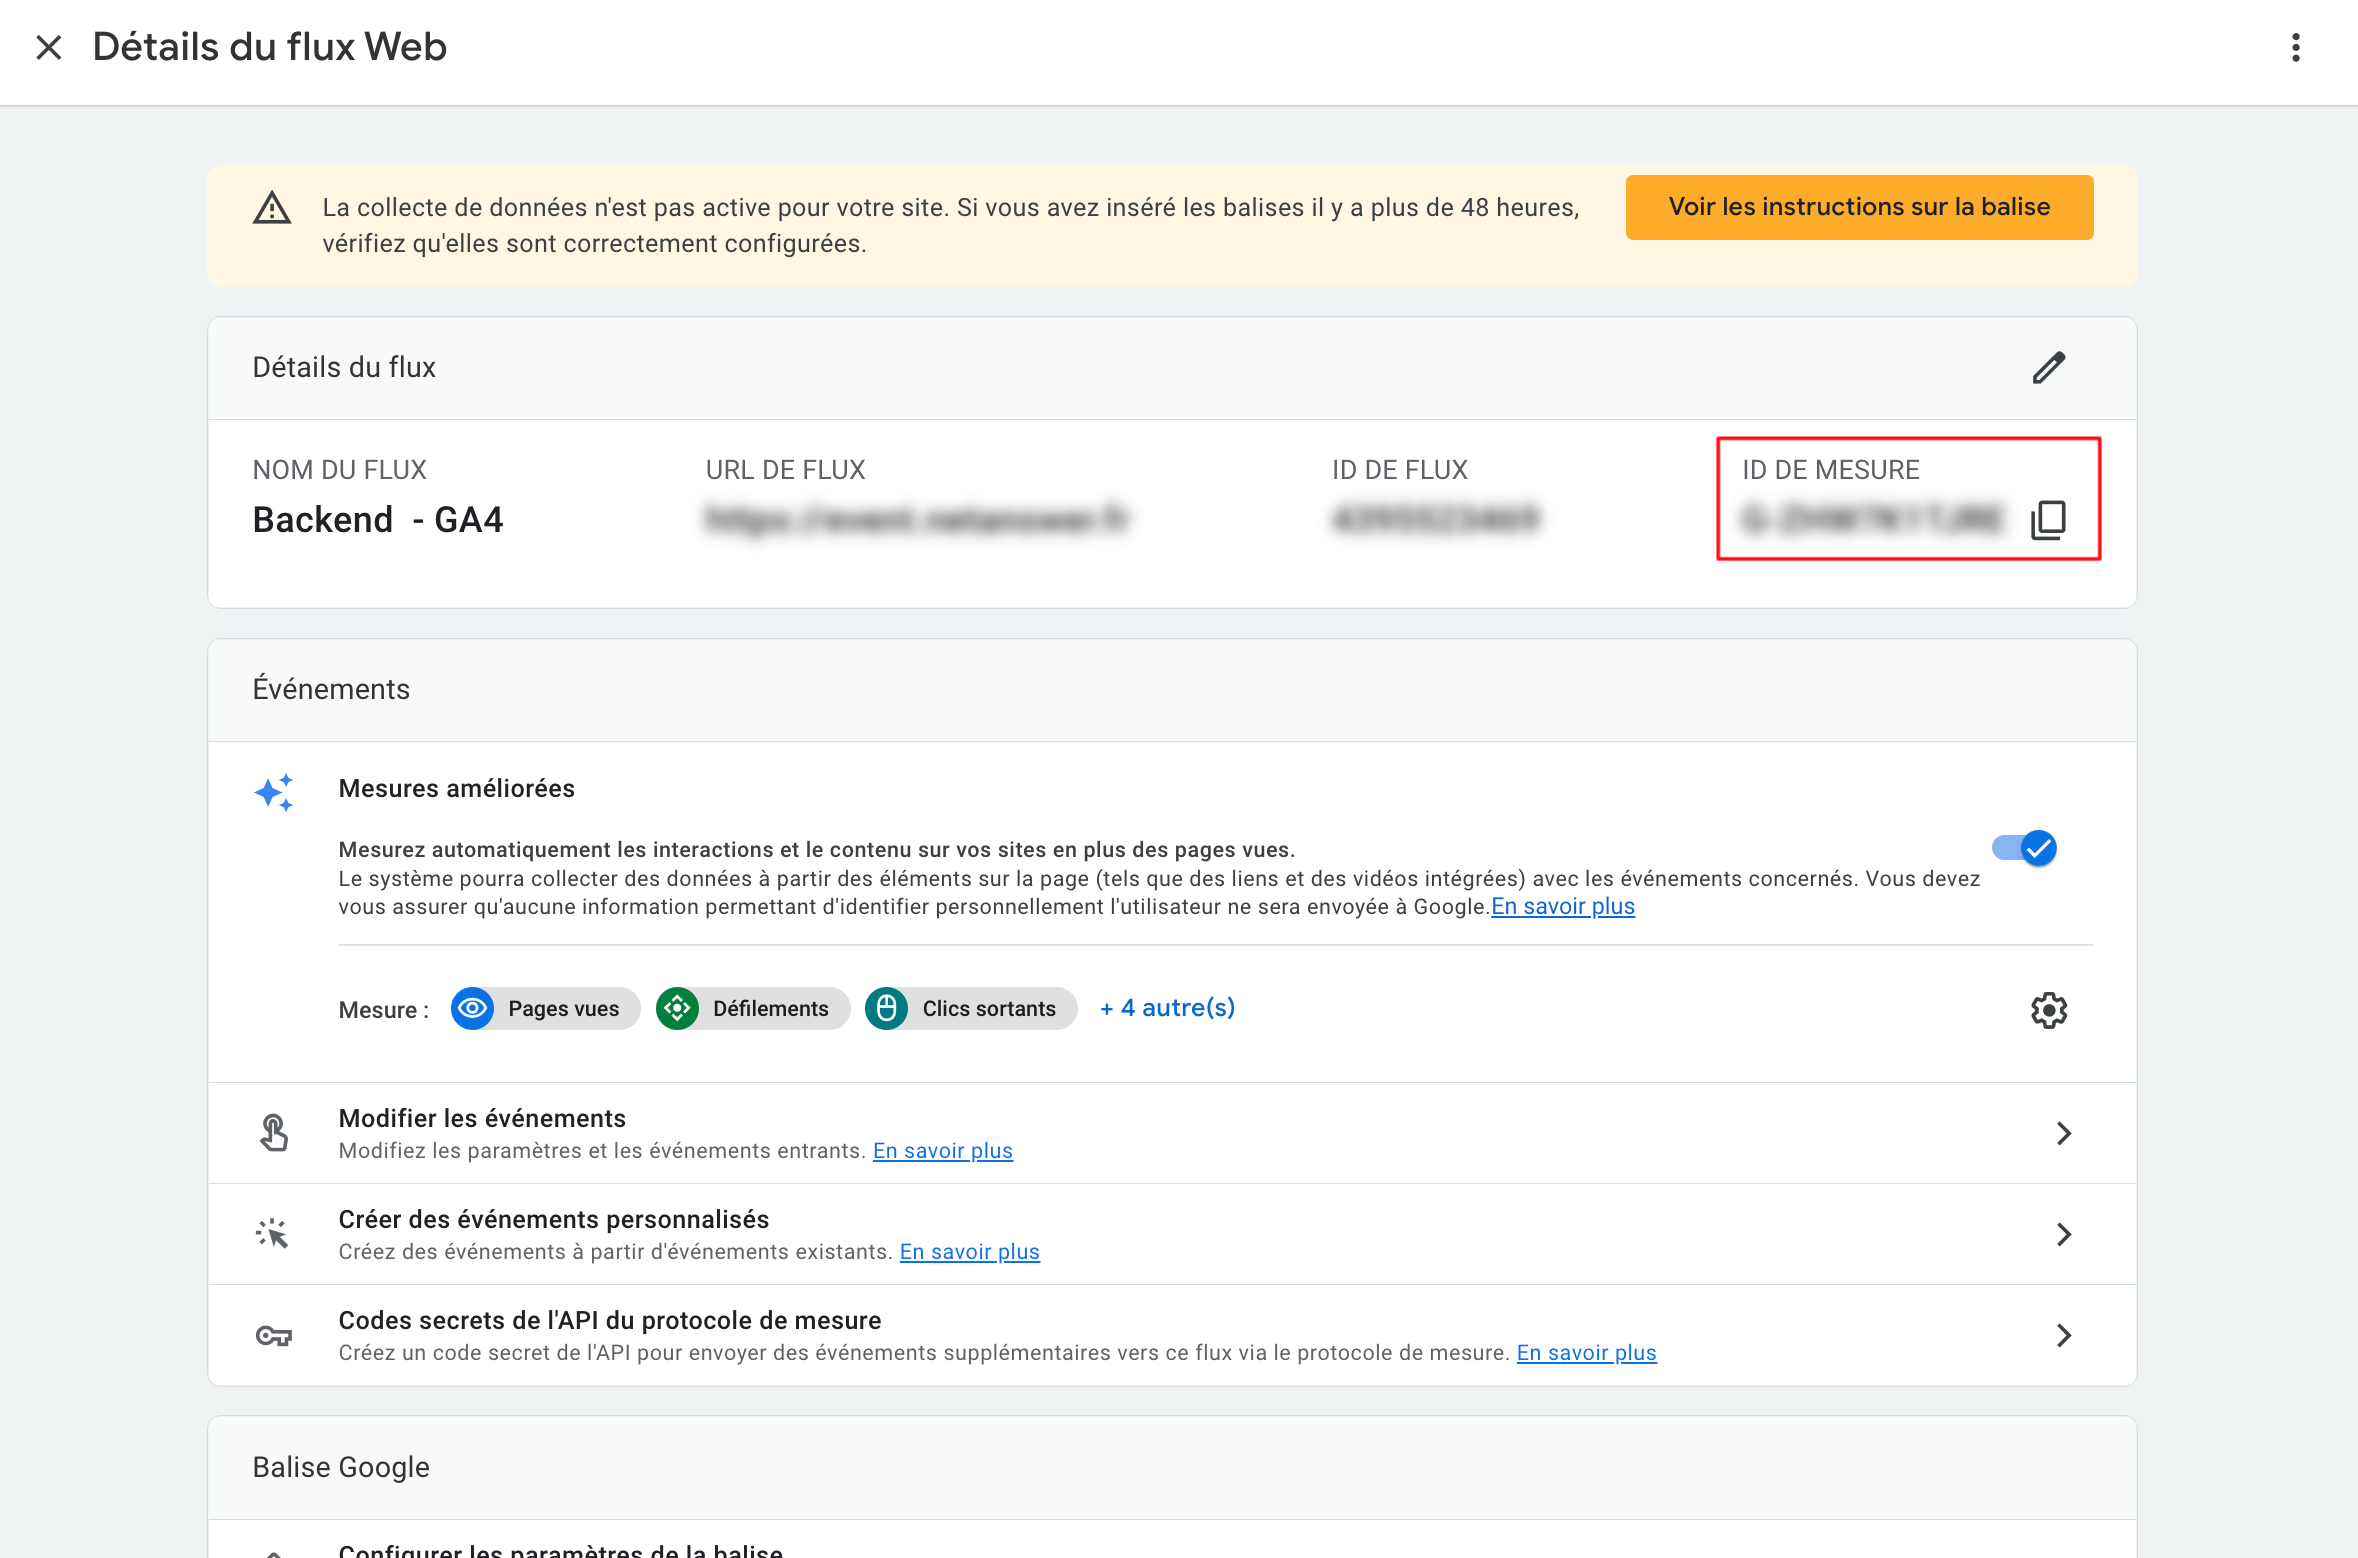
In order to get the code of the tag to be installed on your site, click on "Access your GA4 property" then on "Data flow".

Once on the "Data Flow" page, click on your property.

Copy your "Measurement Id" (tag) it starts with "G-XXXXXXXXXX".
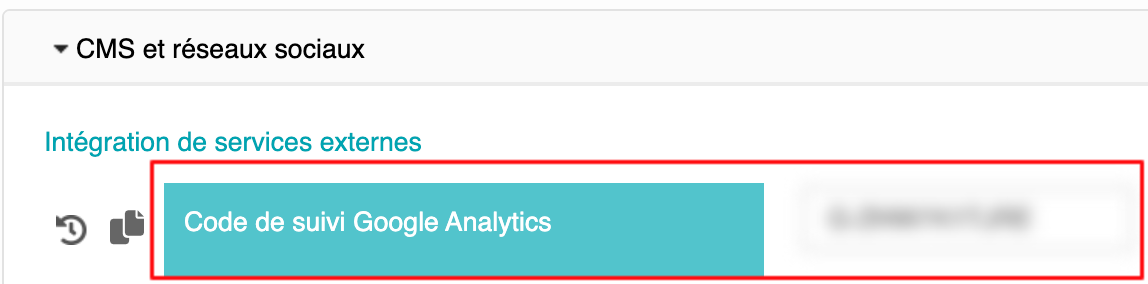
Then go to your back office. In Web Admin > Settings > "CMS and social networks" section and in Google Analytics tracking code, paste your new tag.
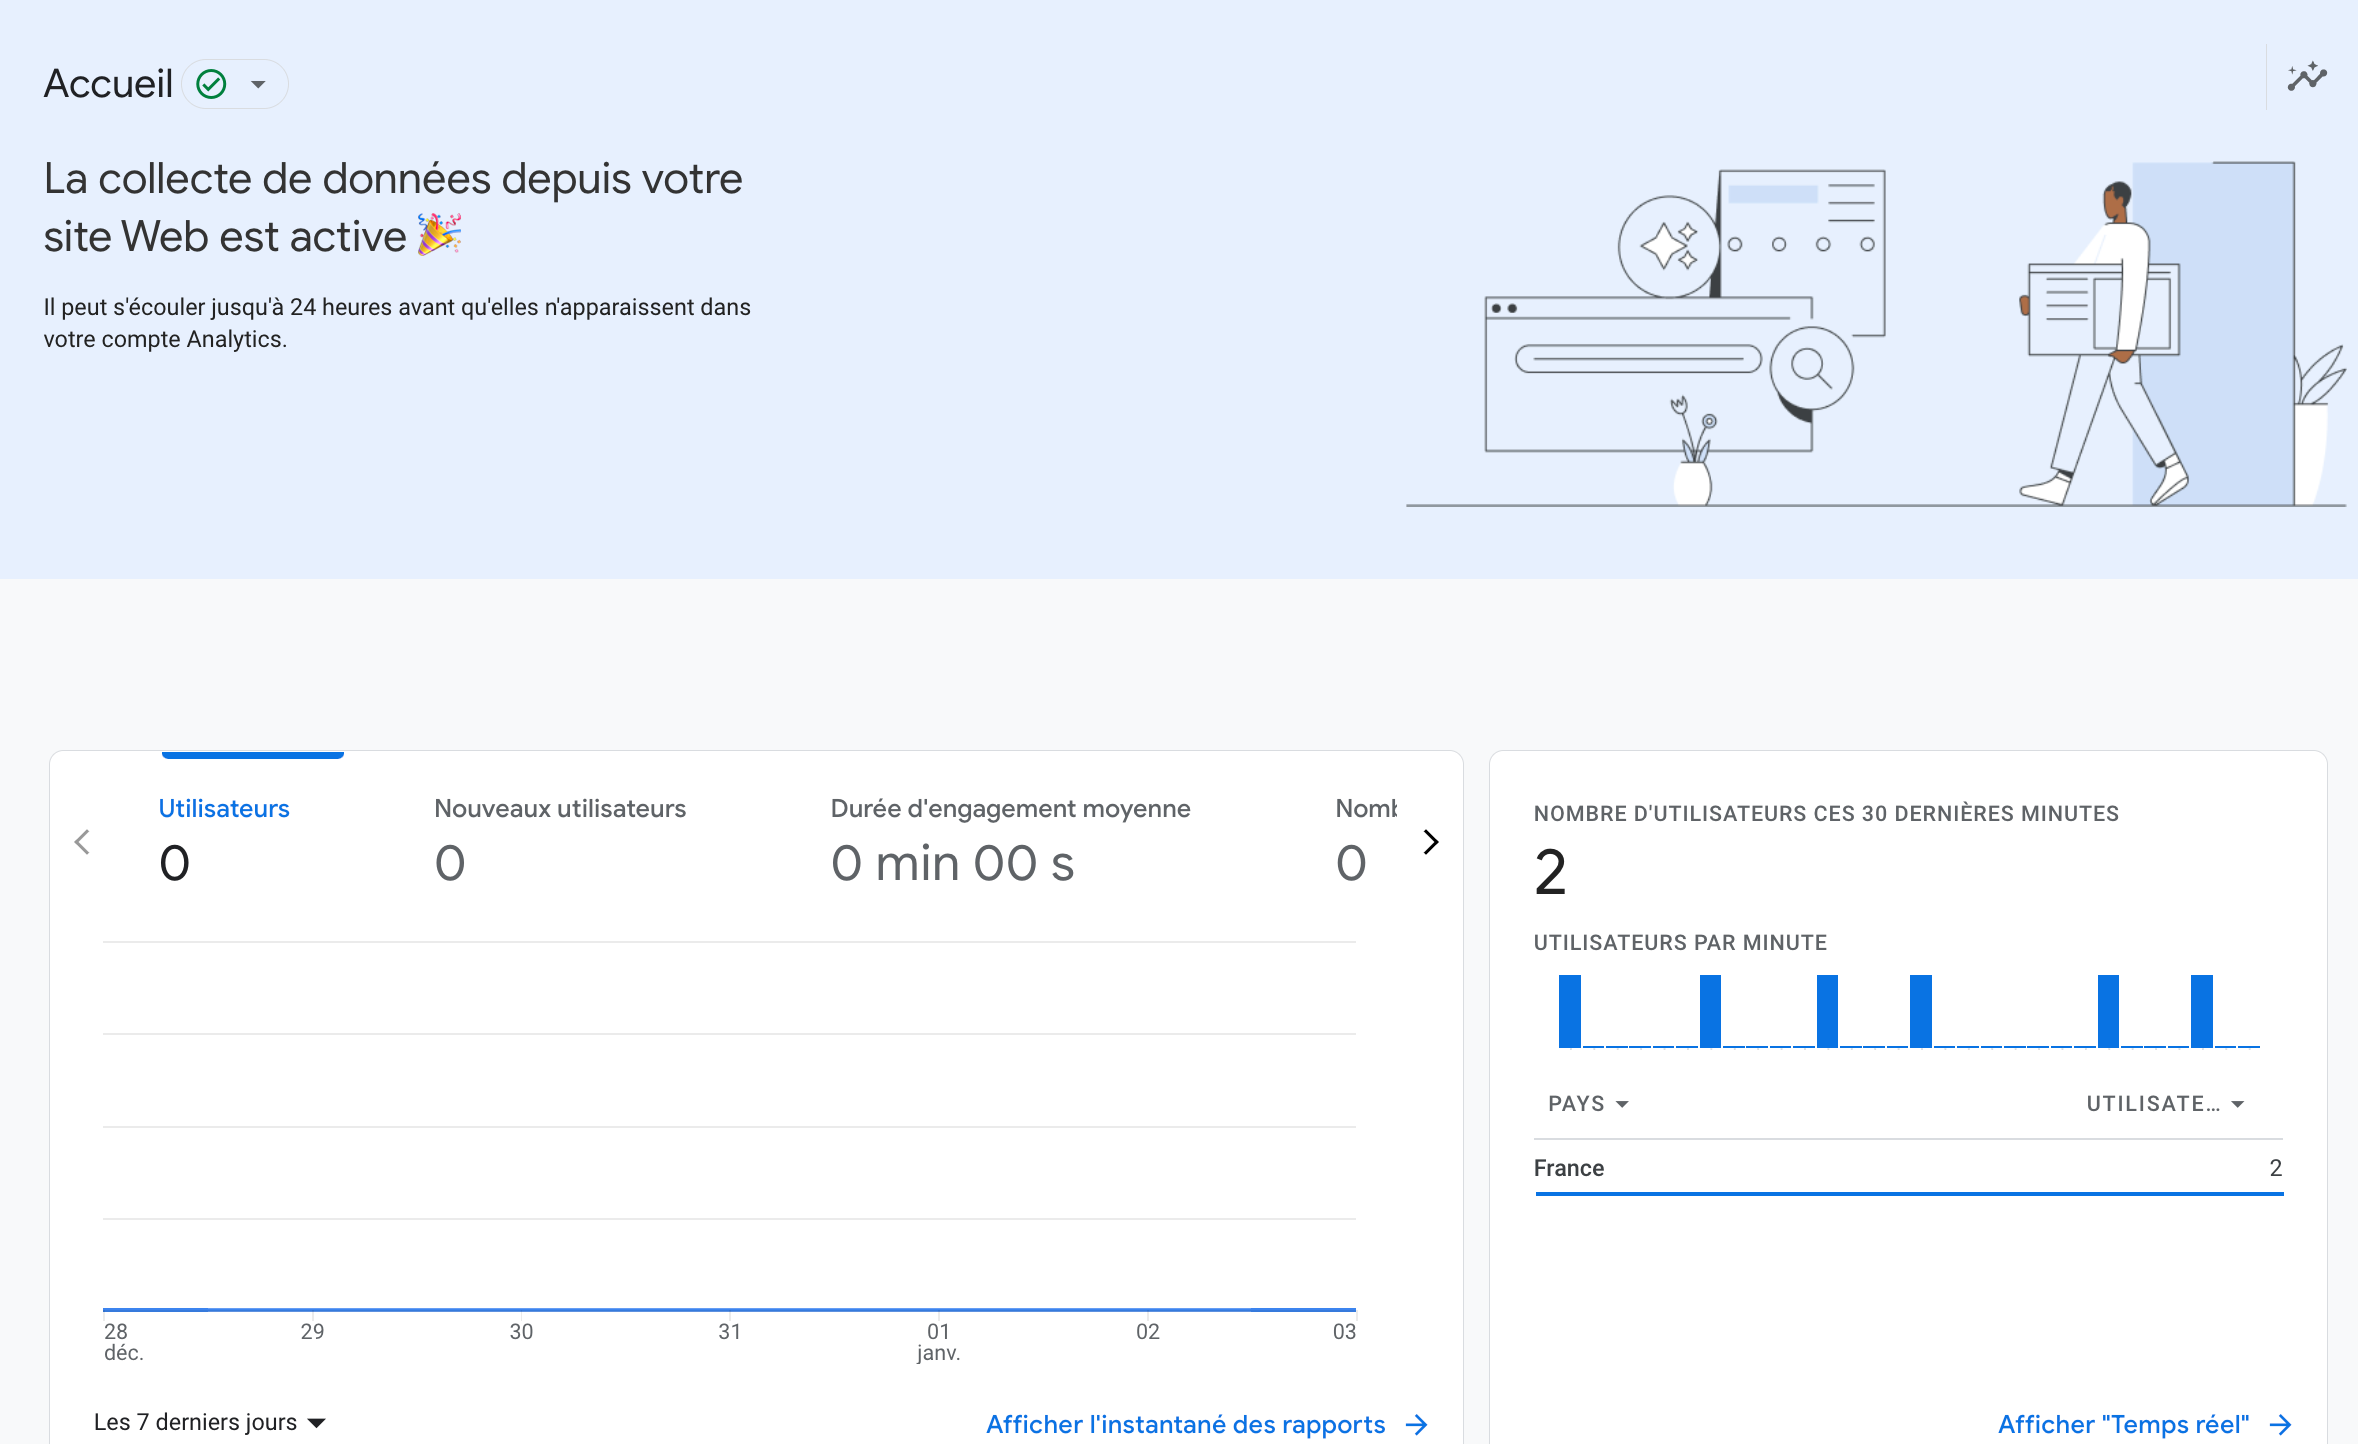
Congratulations! Data collection from your website is active.
You have completed the migration from Universal Analytics to Google Analytics 4.
2.2 Using Google Tag Manager to install the new Google Analytics 4 tag
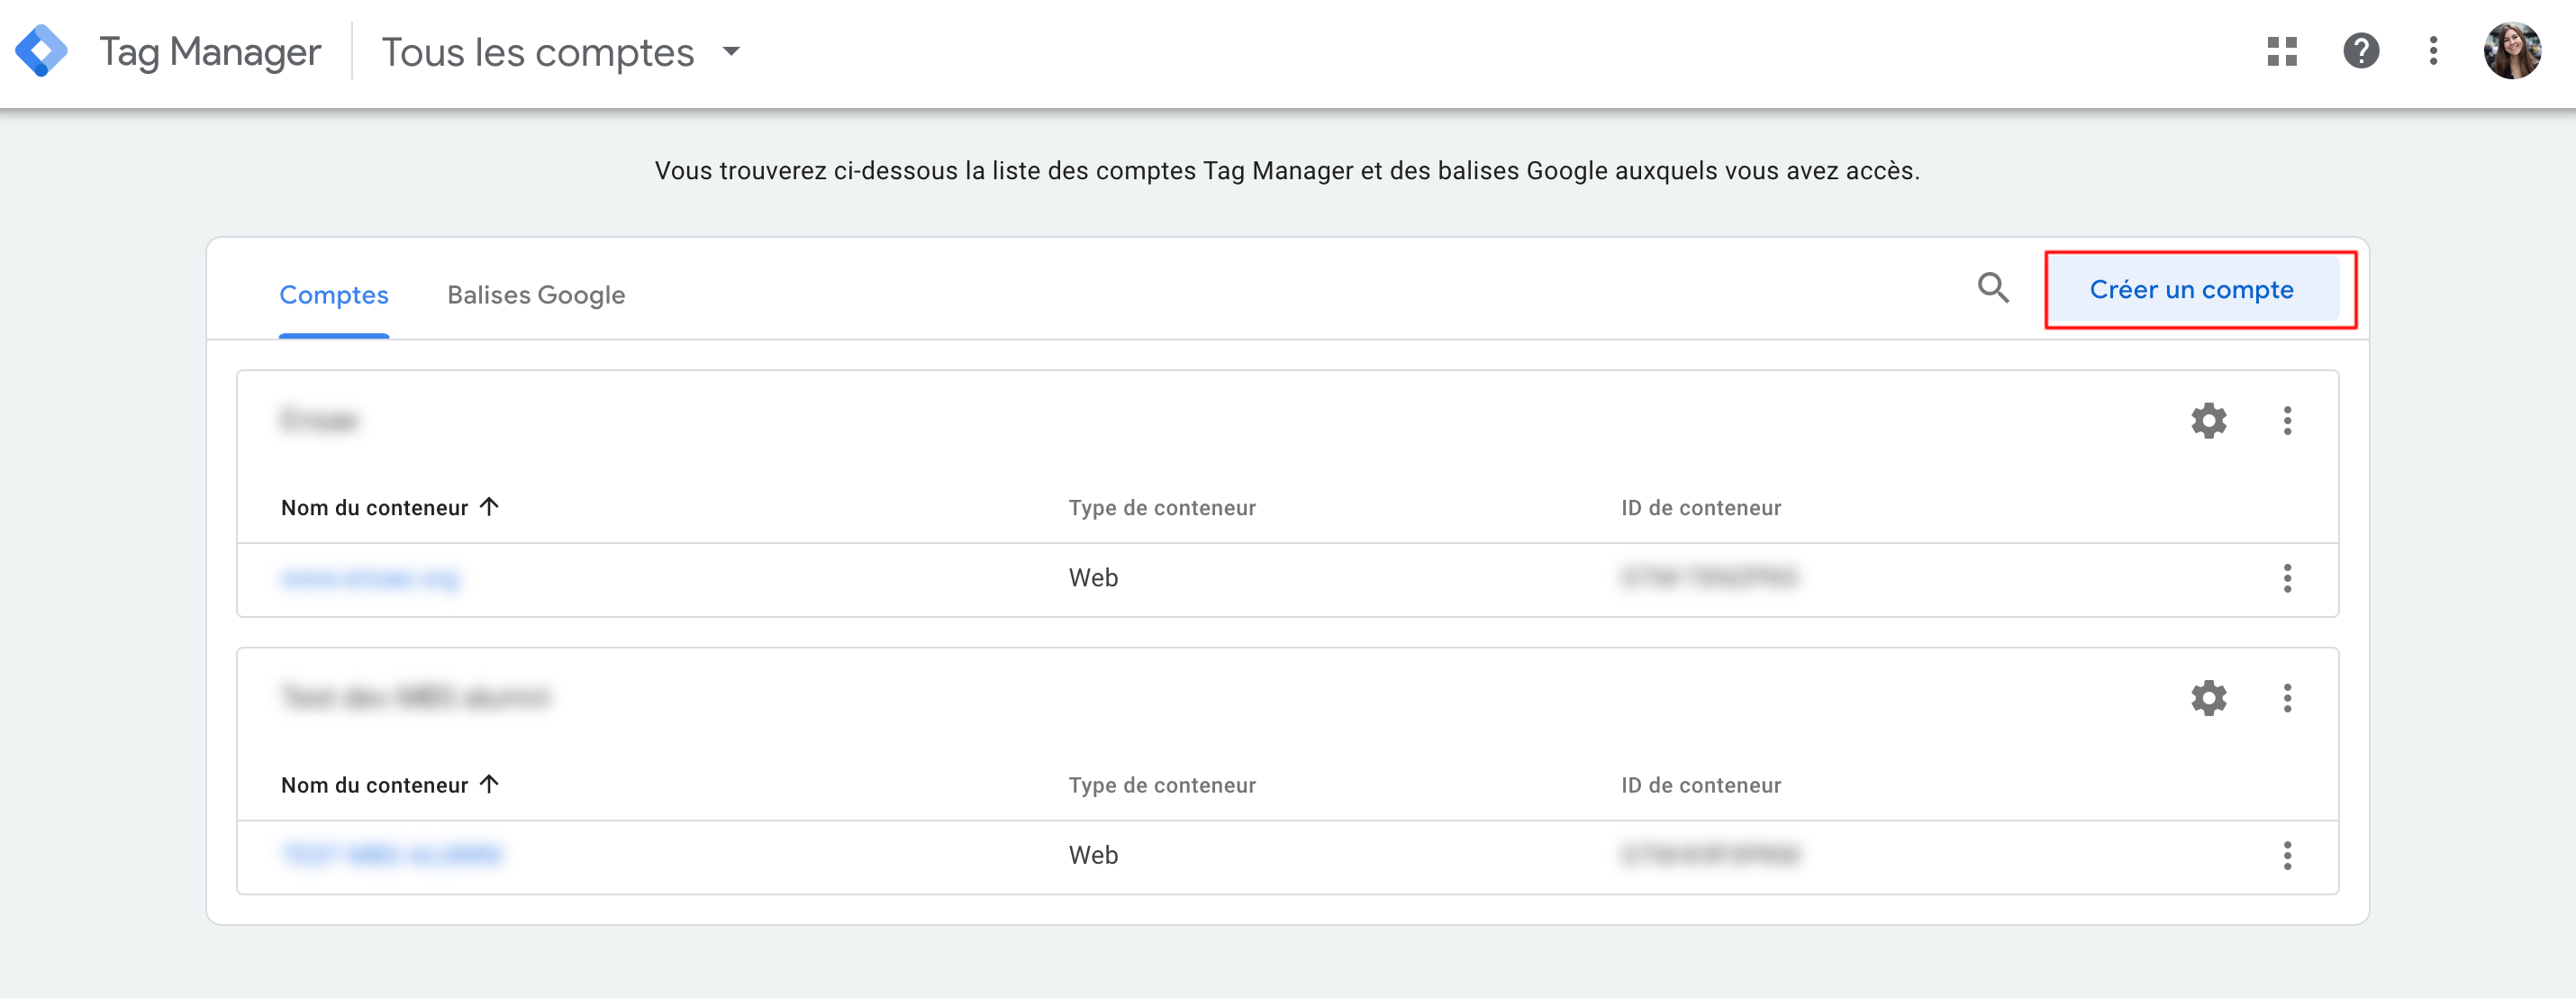
From your Google Analytics account, go to Google Tag Manager
If you do not have an account on Google Tag Manager, click on "Create an account".
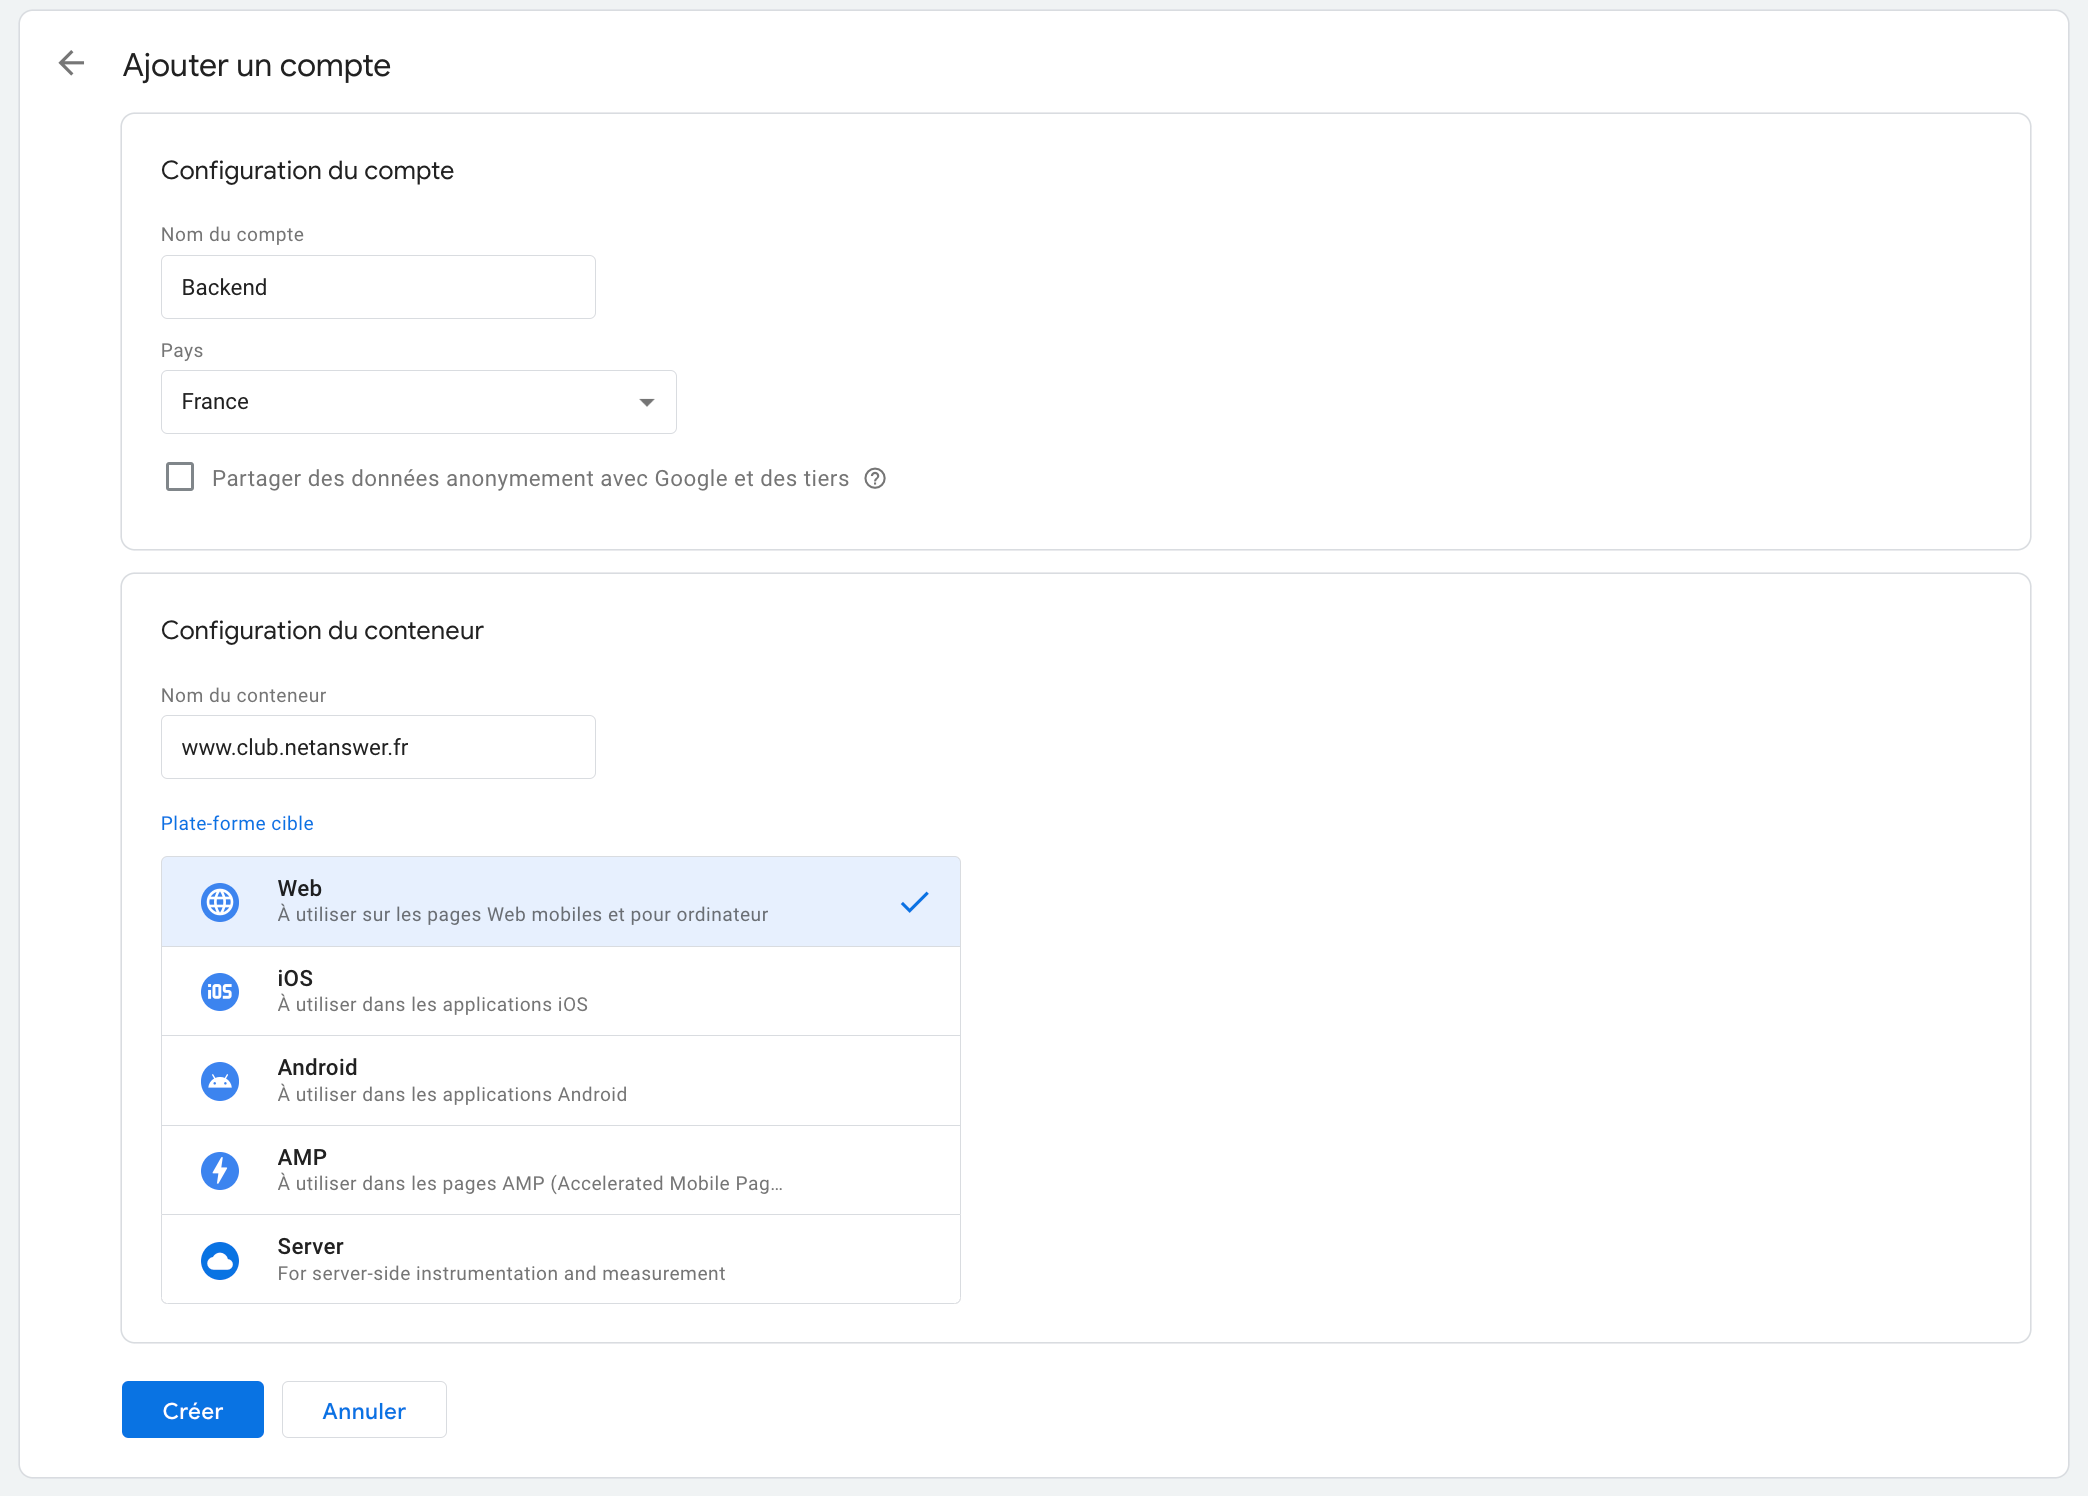
Add :
- A name for your account
- The country of reference
- The name of your site
- The target platform (Web)
then click on "create". You will then have to accept the terms of use of Google Tag Manager
Then go to the "Admin" tab and get your Google Tag Manager tag, it starts with "GTM-XXXXXXX".
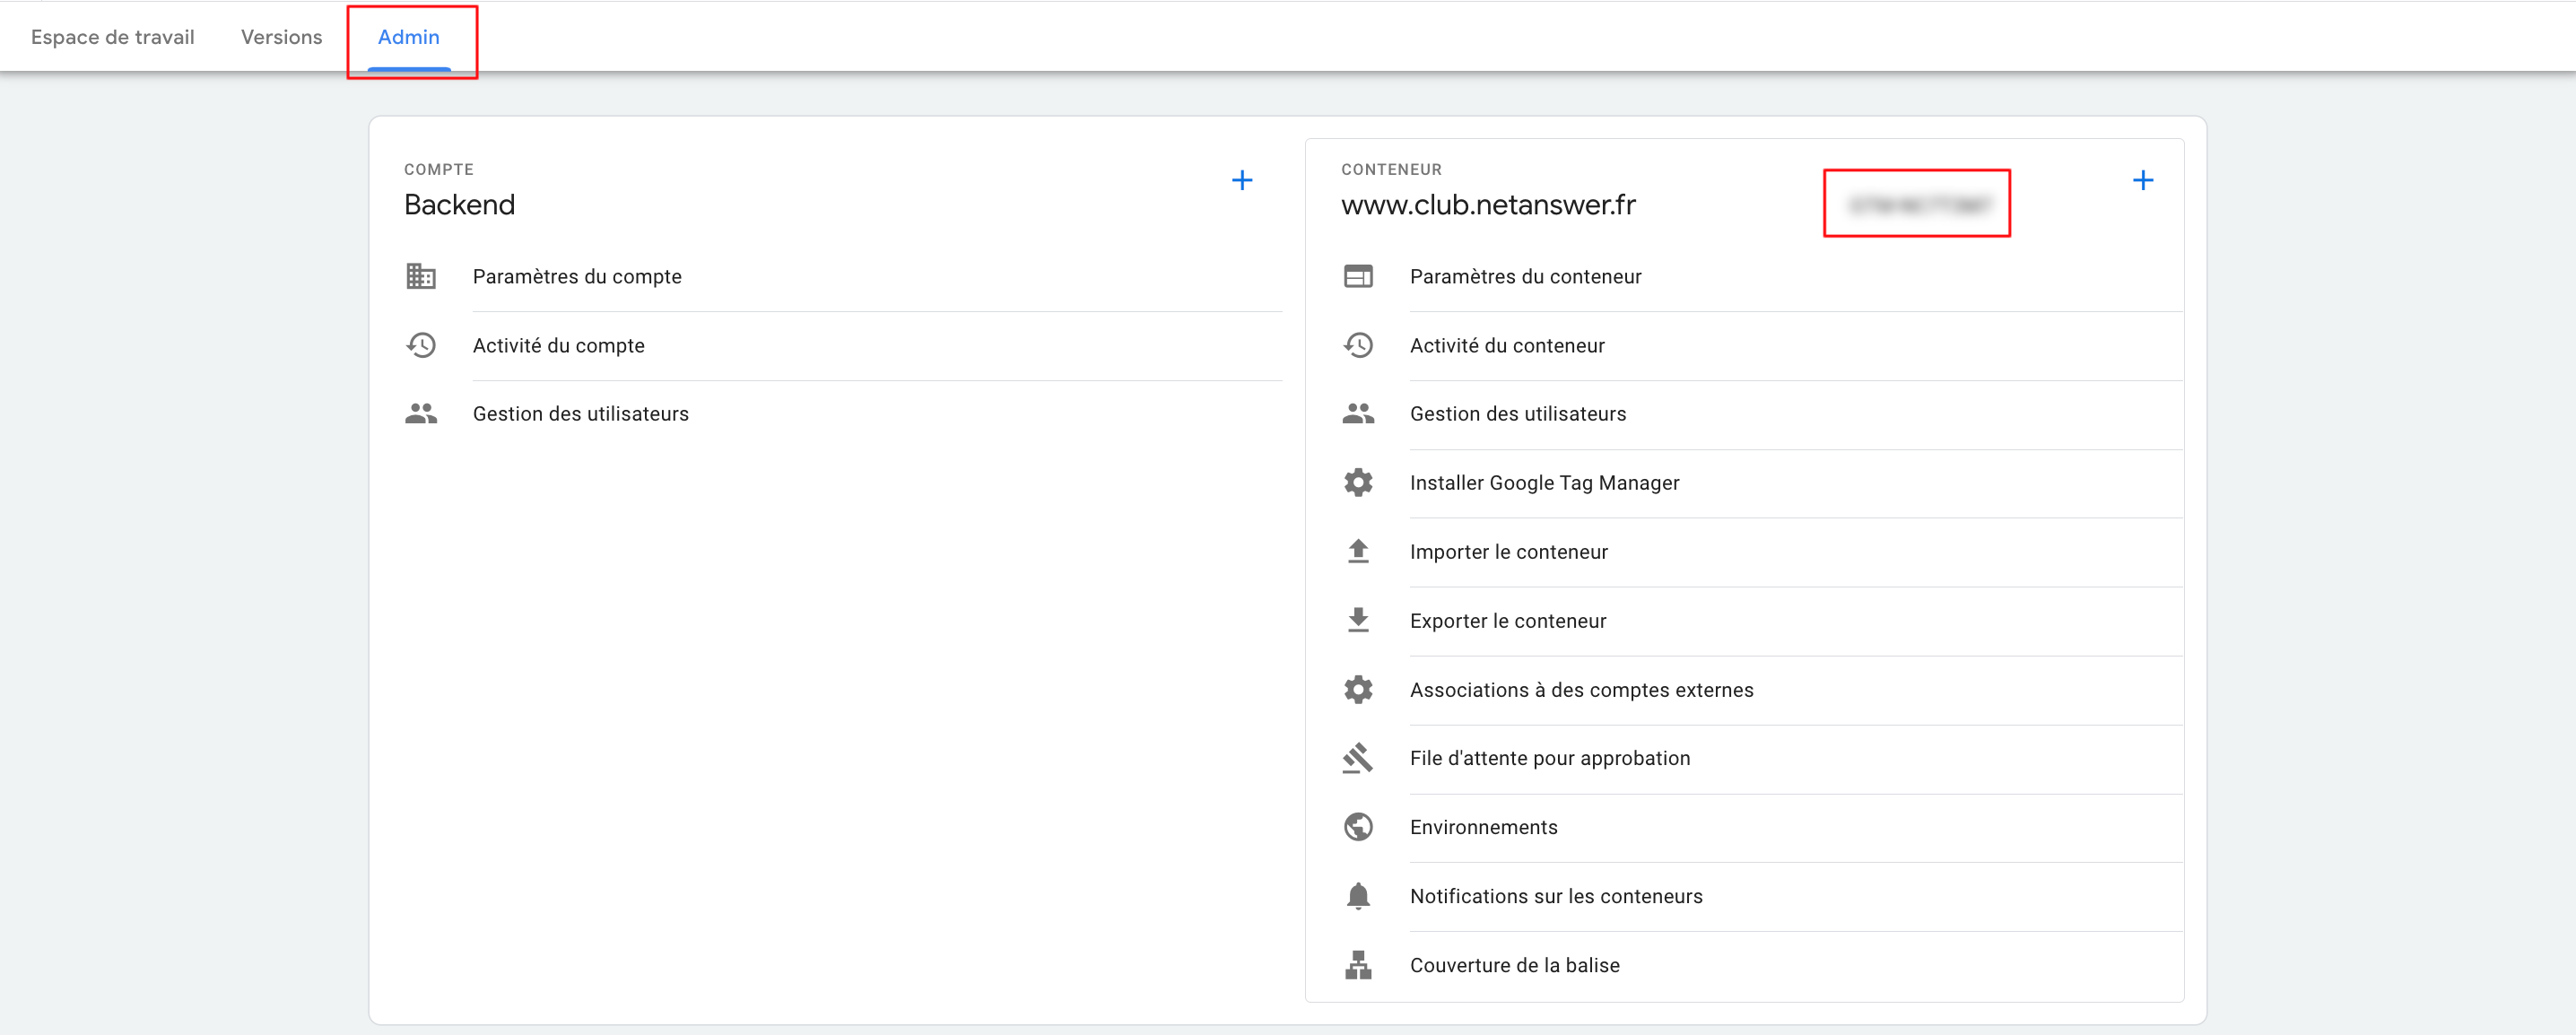
Then in WEB Admin > Settings > "CMS and social networks" section and in "Google Tag Manager tracking code", paste your tag.

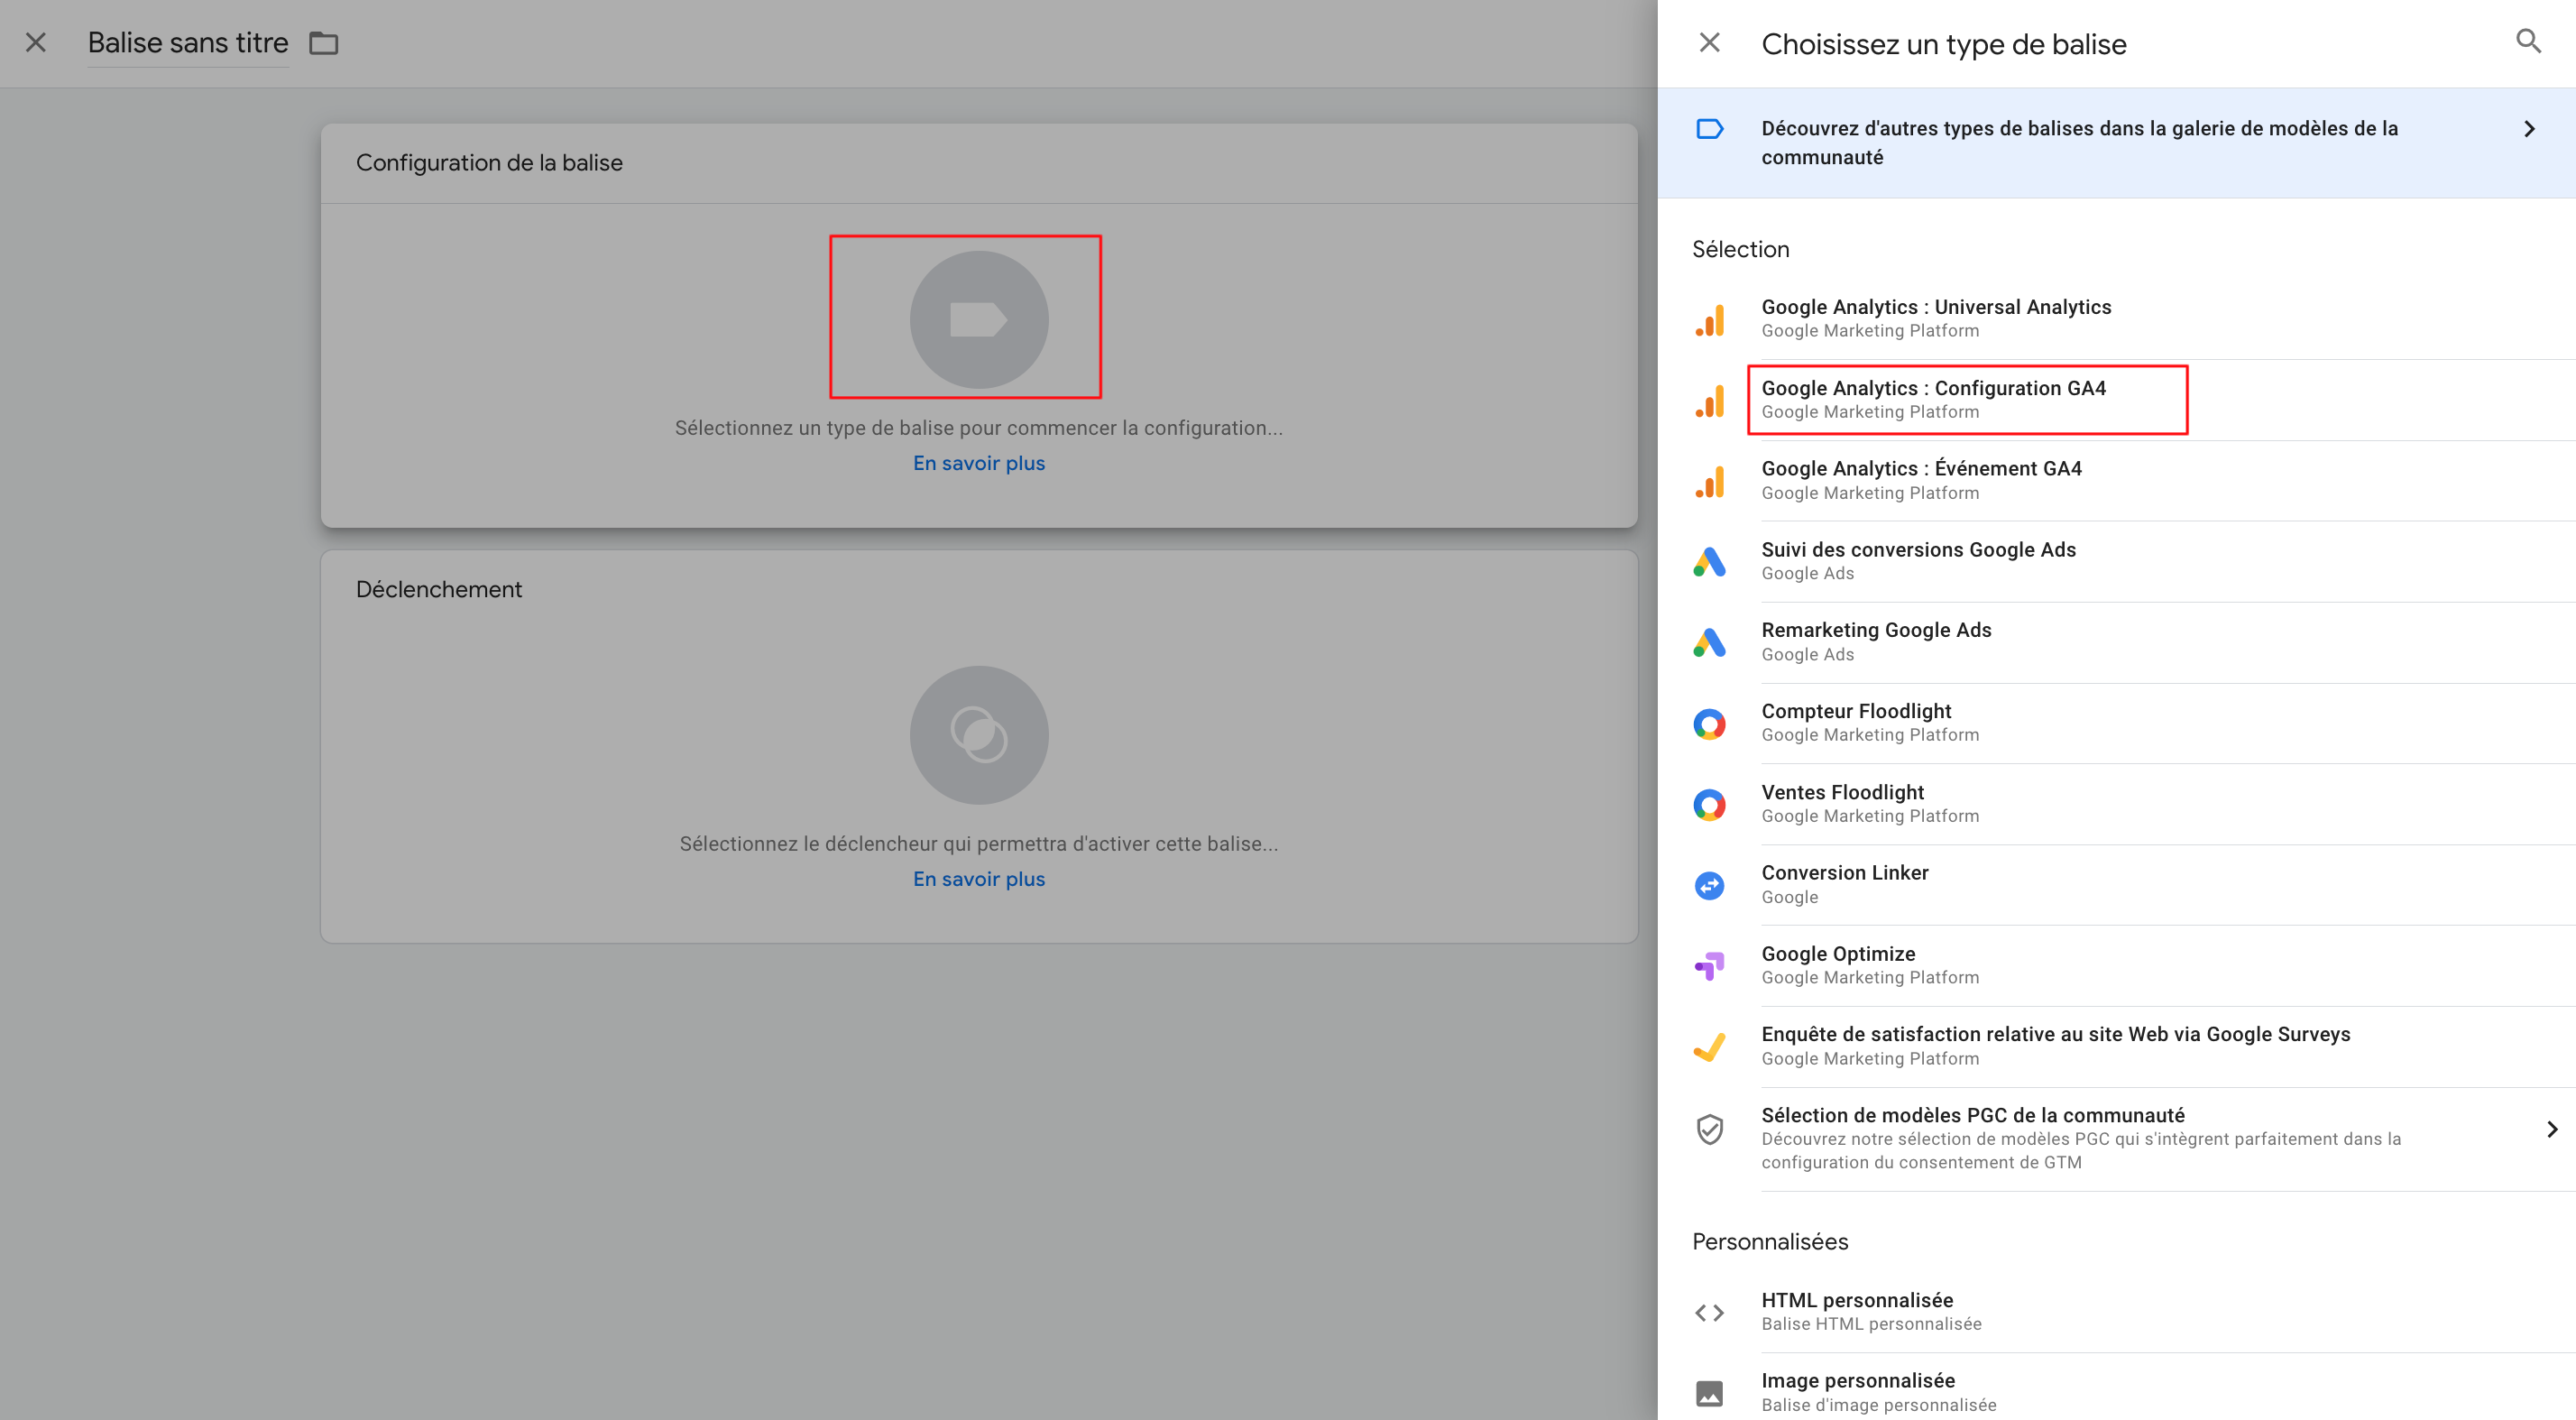
Now go back to Google Tag Manager and click on "Tags" -> "New"
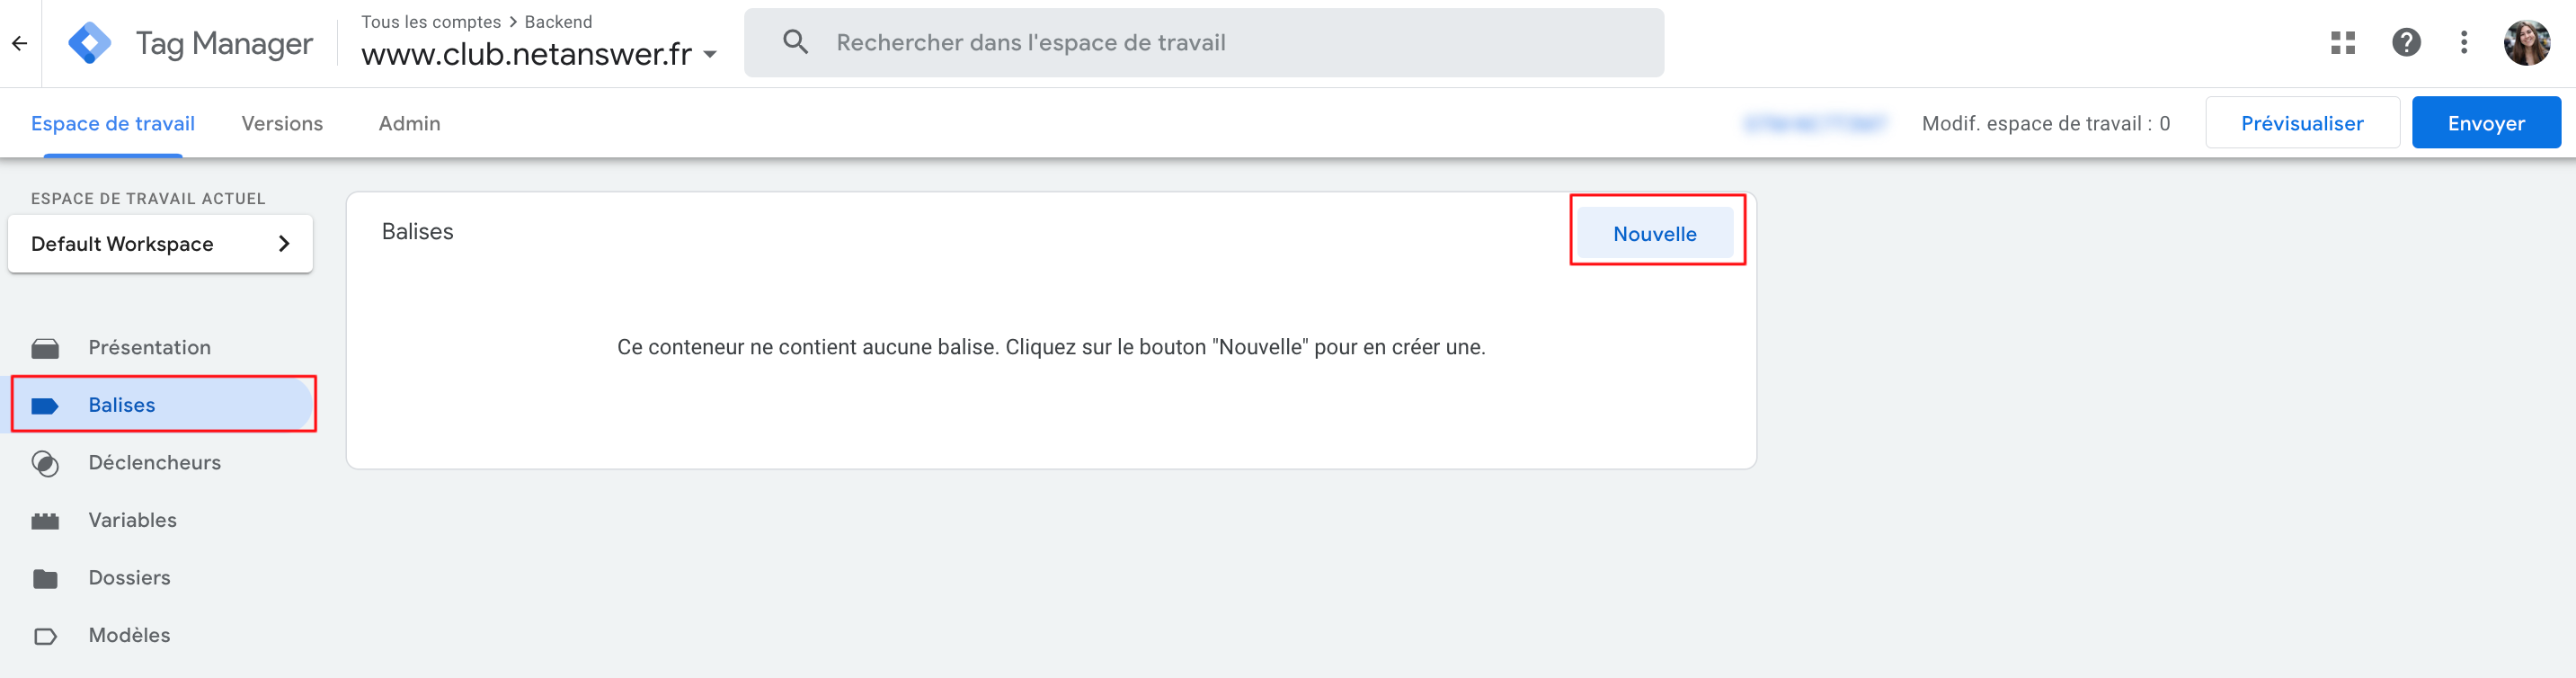
Click on "Tag Configuration" and then choose "Google Analytics: GA4 Configuration".
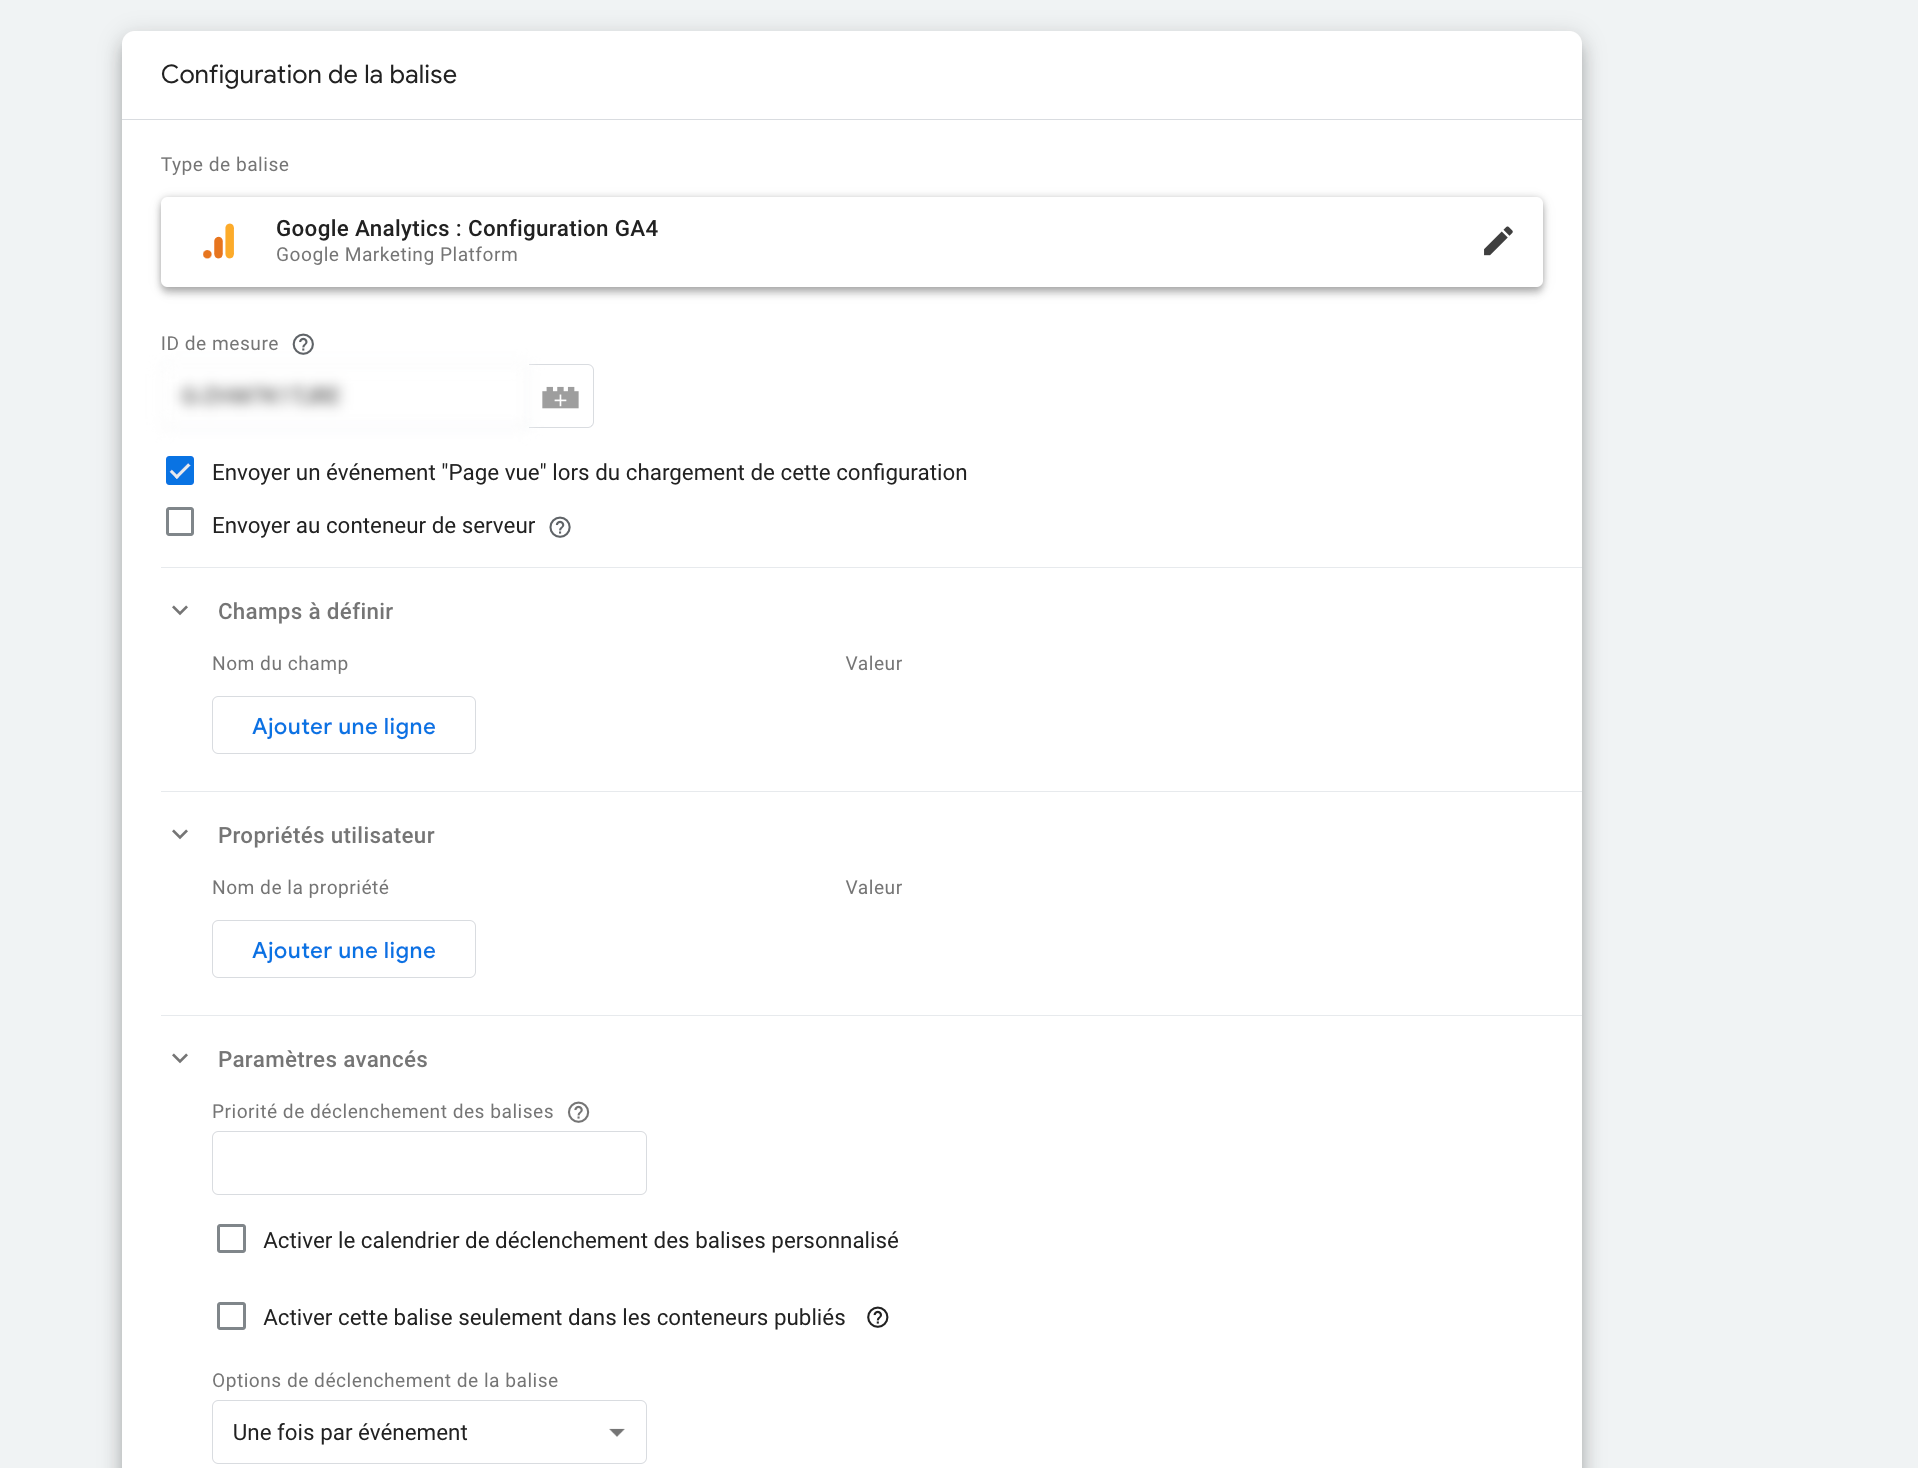
In the "Measure ID" field, enter your GA4 tracking code (G-XXXXXX)
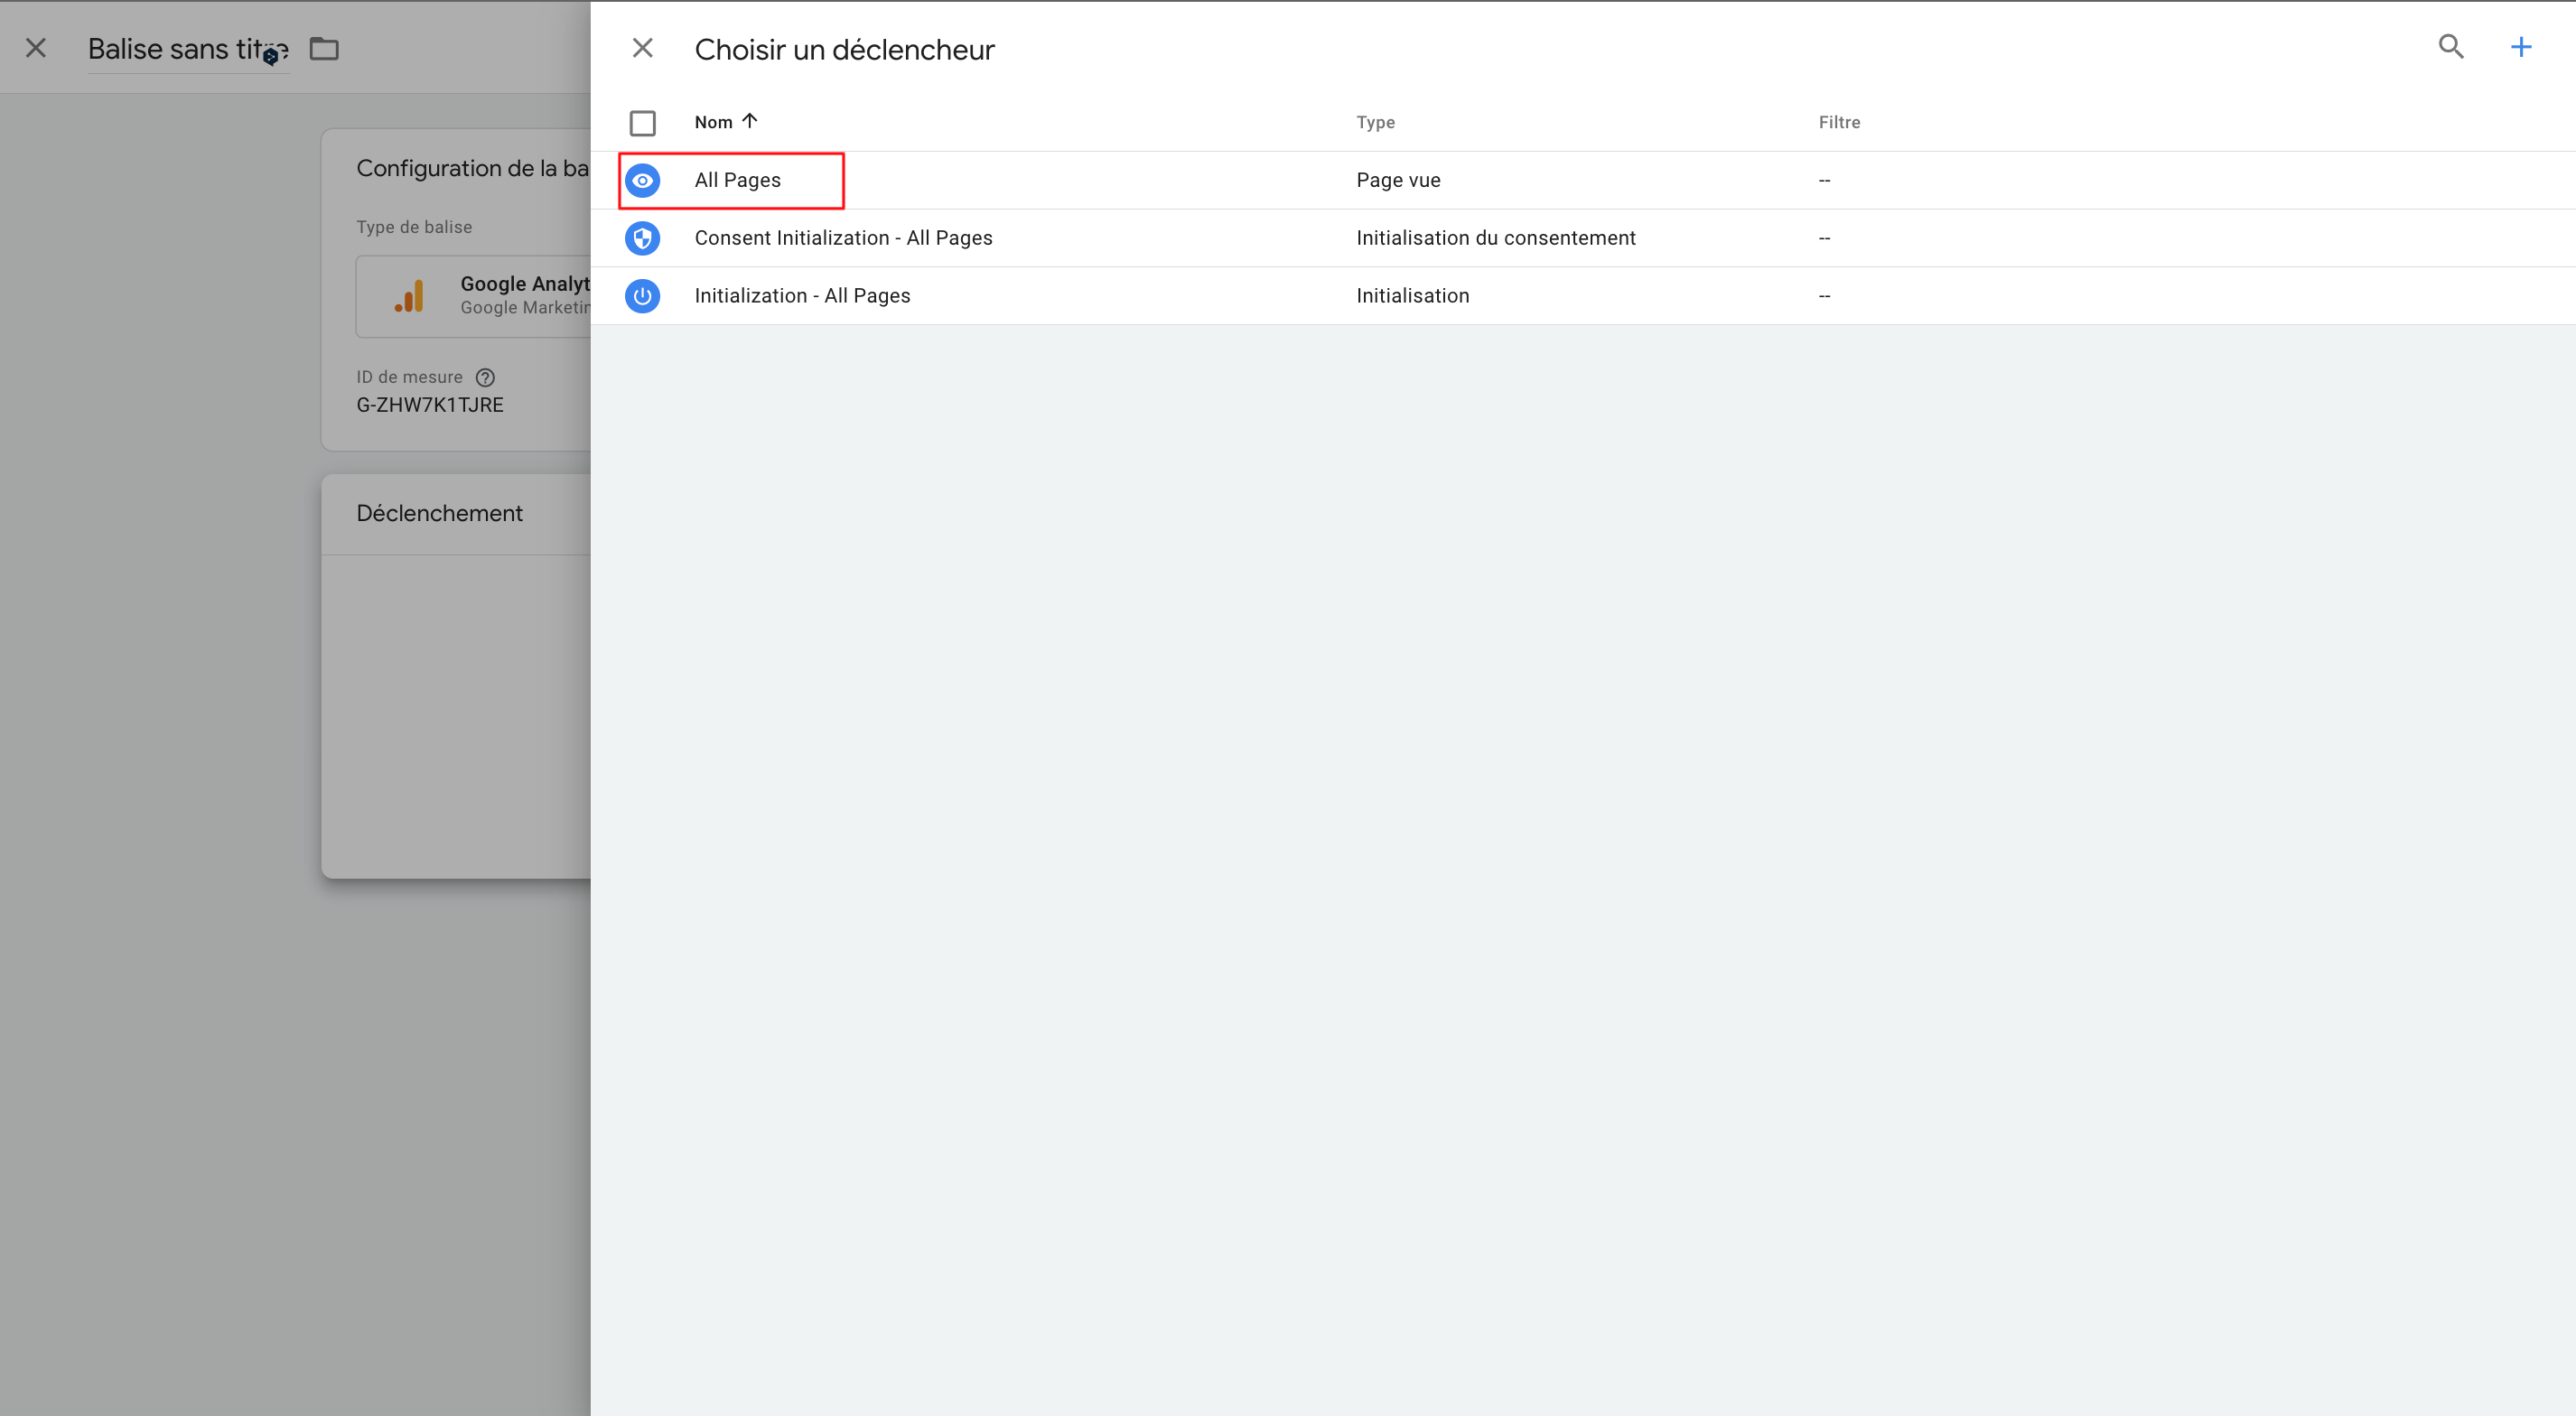
Scroll to the bottom of your page, then in the "trigger" section click and choose "All Pages".
Then add a title to your tag and click on "Save". You just have to click on the " Send" button to finalize the configuration.
Congratulations! Data collection from your website is active.
You have completed the migration from Universal Analytics to Google Analytics 4.


No comment
Log in to post comment. Log in.