News

Discover the Contributions module
Would you like to collect your members' input on actions to be implemented for your association? Do you want them to participate in the development of ideas?
Discover our new module: Contributions.
With our new Contributions module, you can now offer your members the opportunity to voice their opinions (via a vote with several different degrees of detail) on issues related to a given field of action. In this way, they become active players by being able to submit their own contributions in response to the issue at hand.
1. Activation and configuration
1.1. How to activate the module?
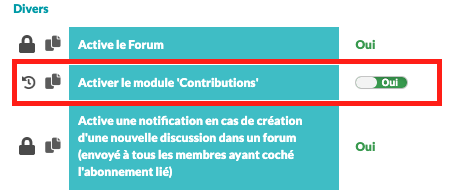
In order to use this new module, go to your back office and click on AdminWeb > Settings > CMS social networks > Miscellaneous and tick the contributions box.
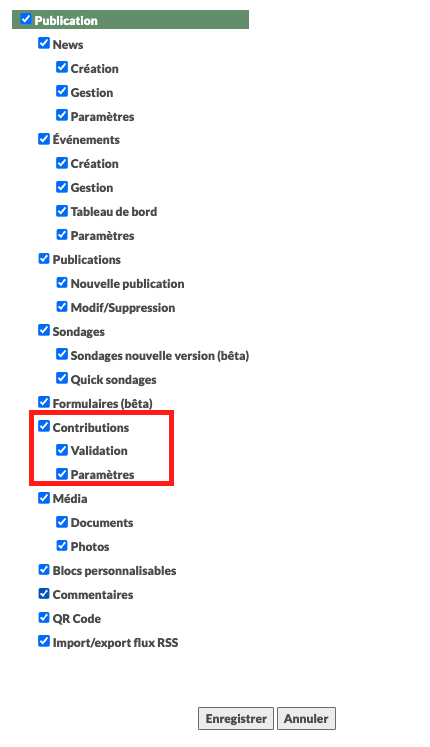
Once the module is activated, you have to activate the administrator rights to access it. To do this, go to the Web Admin > Administrator tab. Click on the first specific icon (the one for publications) then tick the " Contributions " check box. Finally, click on save to save your changes.
The module will then appear in the Publication > Contributions section.
1.2 Link the contribution module in your tree structure
In order for your module to be visible on your website, you must link the module in your tree structure. To do this, go to the Web Admin tab > Menu management > Tree structure.
To create your new menu, click on the "add" button at the bottom of the page. Give it a name, for example, "Contributions", then confirm by clicking on the green tick.
Then, in the drop-down menu, you have two options for pages:
- A "Discover the contributions" page for viewing contributions
- A “Submit a contribution" page for submitting contributions

Validate your new menu by clicking on the "Validate" button at the bottom of the page to save your changes.
1.3. Setting up your module
To set up the module, click on Publications > Contributions > Settings.
On this page, you can add the domains and topics you want to use. You can link several topics to the same domain.
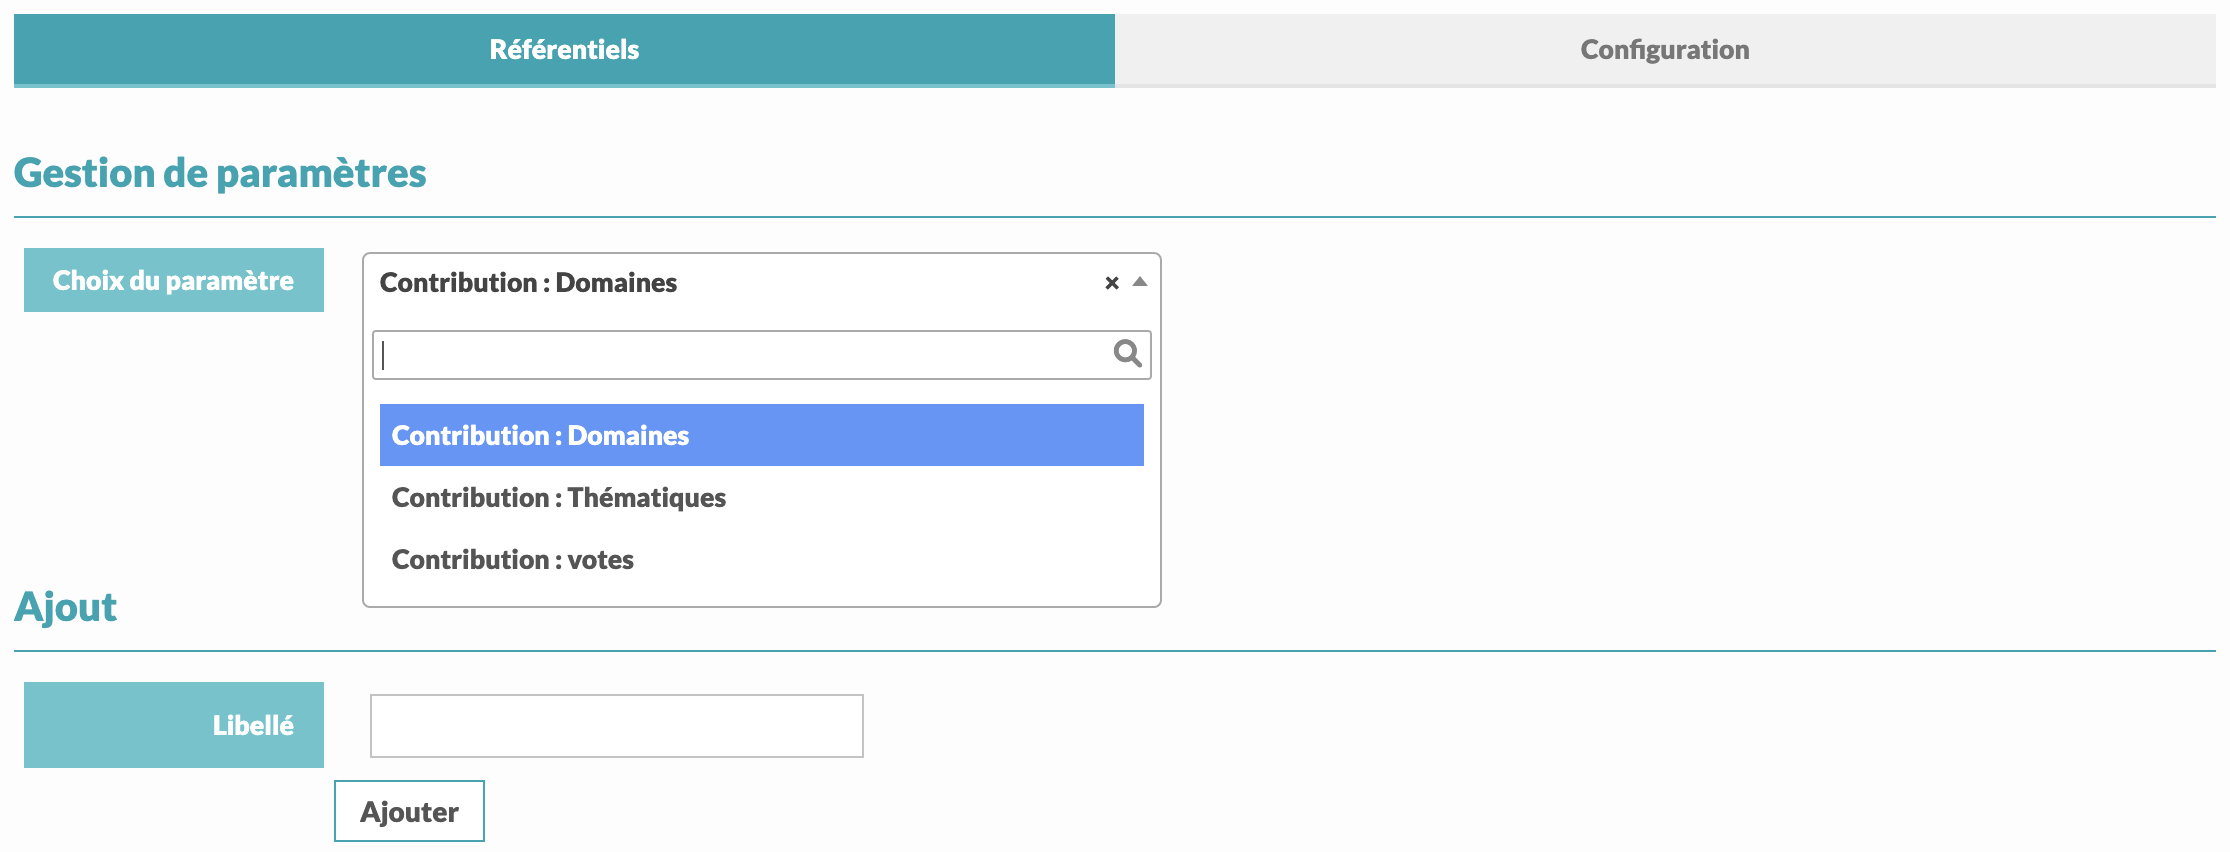
1.3.1 Add a topic
If you'd like to add a topic, select "topics", enter the name of your new topic, and click on "add".
1.3.2 Add a theme
If you wish to add a theme then select "themes" then enter the name of your new theme and click on "add".
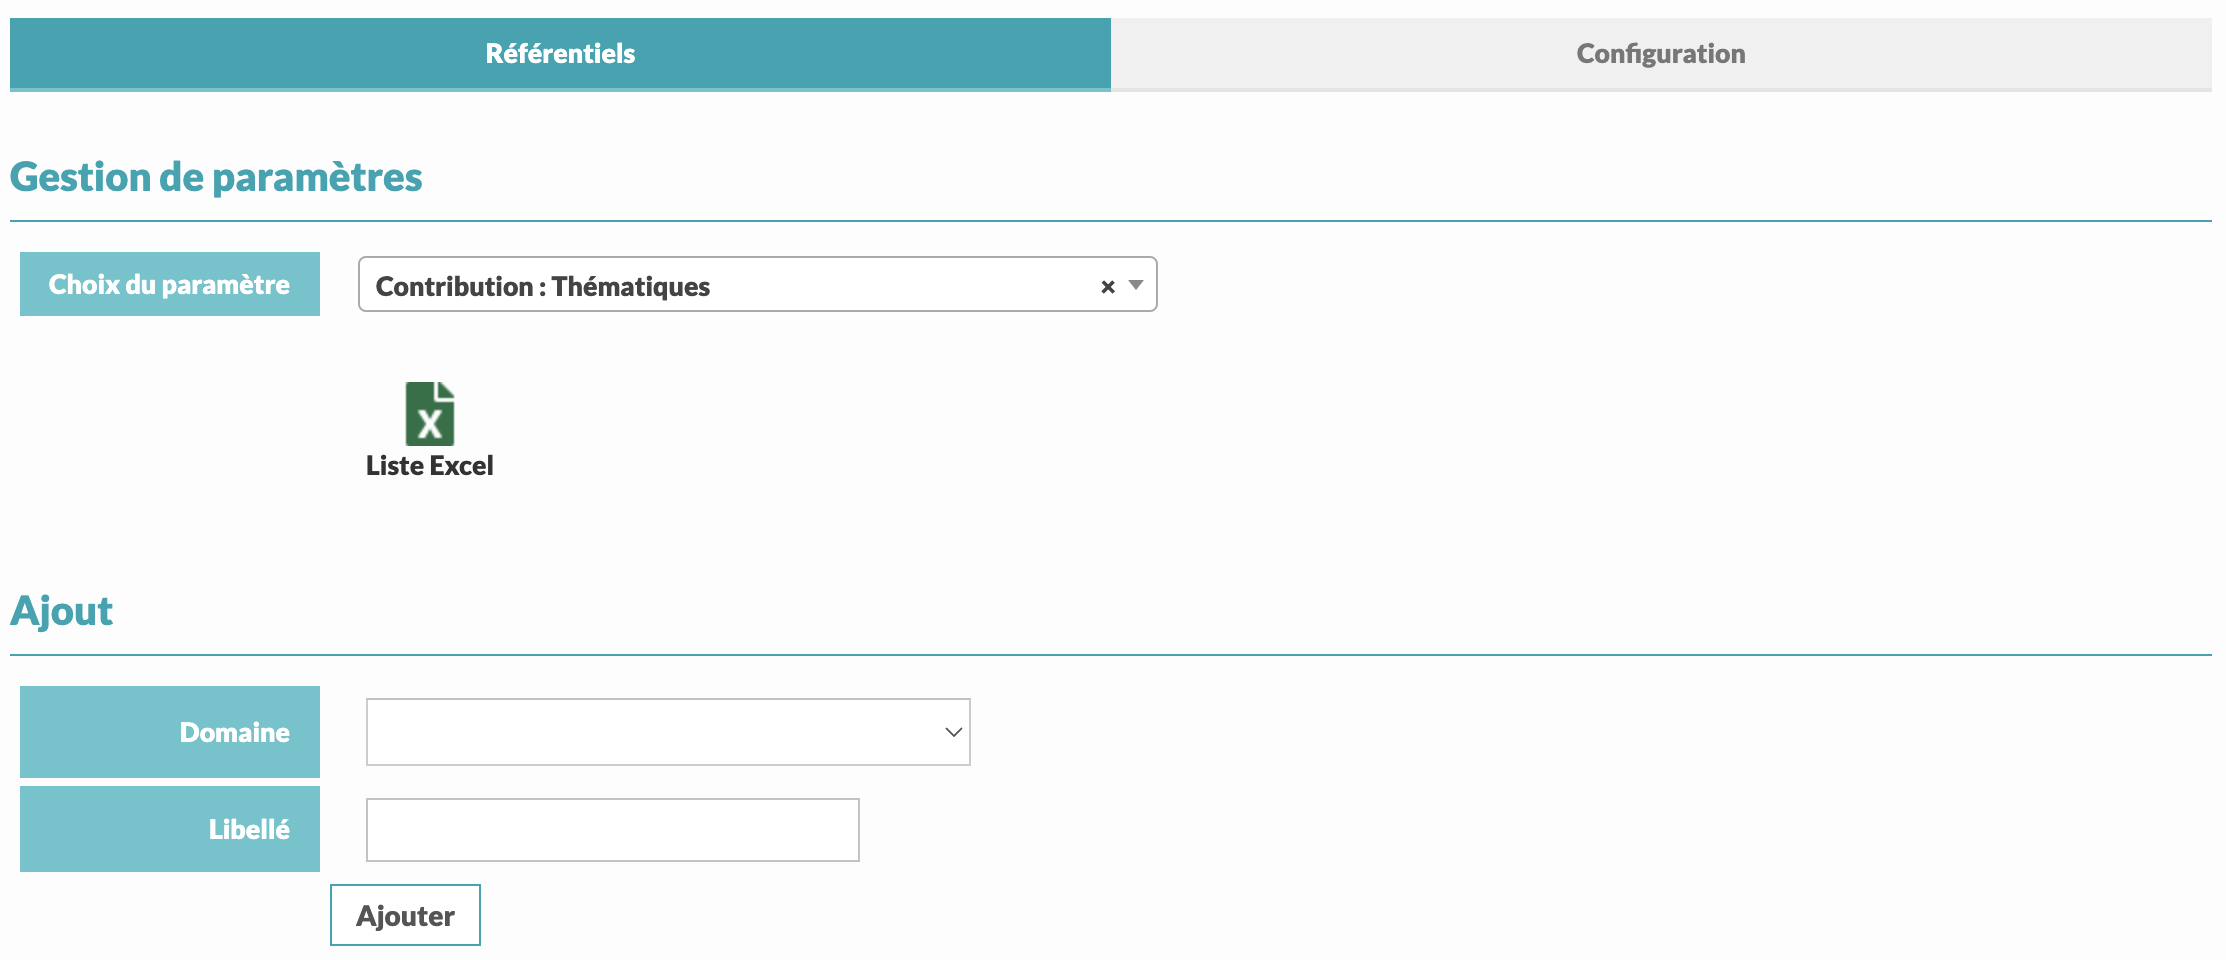
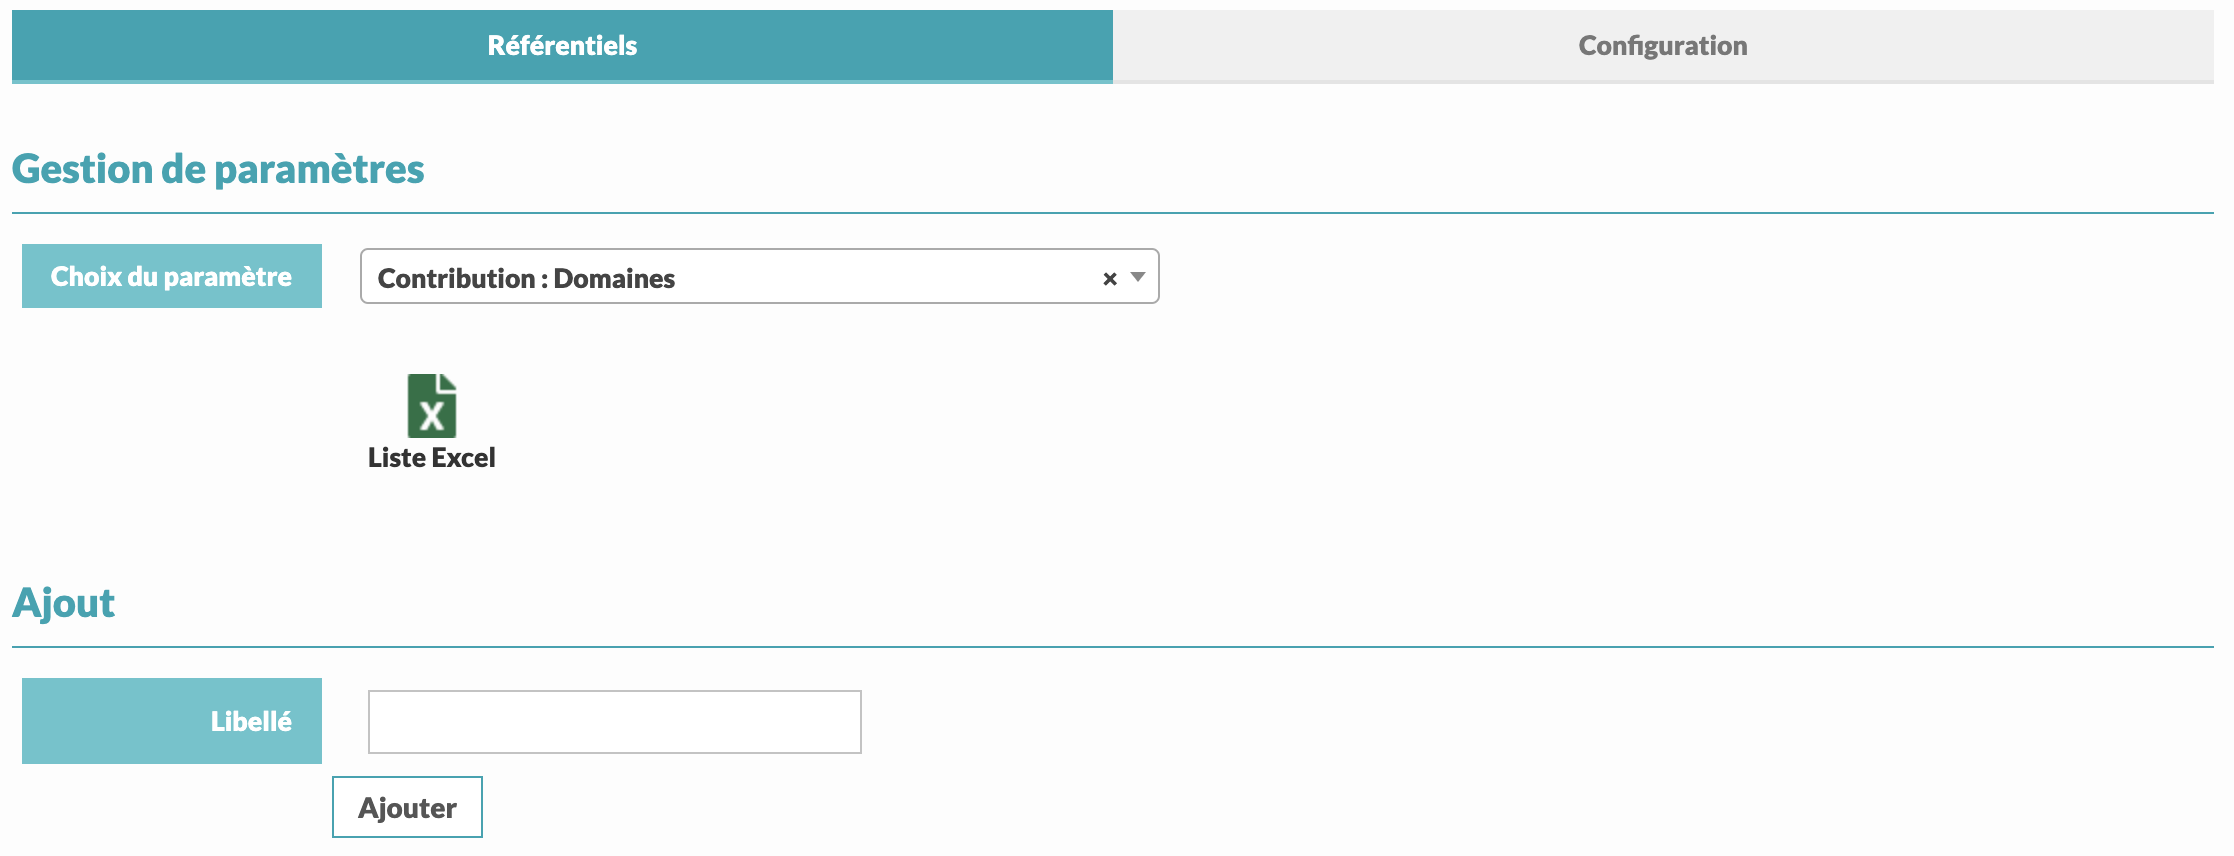
At the bottom of the page, you can see all the domains and topics that you have been created in, as well as the number of contributions within a domain, which we call "hits". You can also choose to turn on or off the topic by dragging the check mark to yes or no as desired and you can delete a topic by clicking on the red cross.

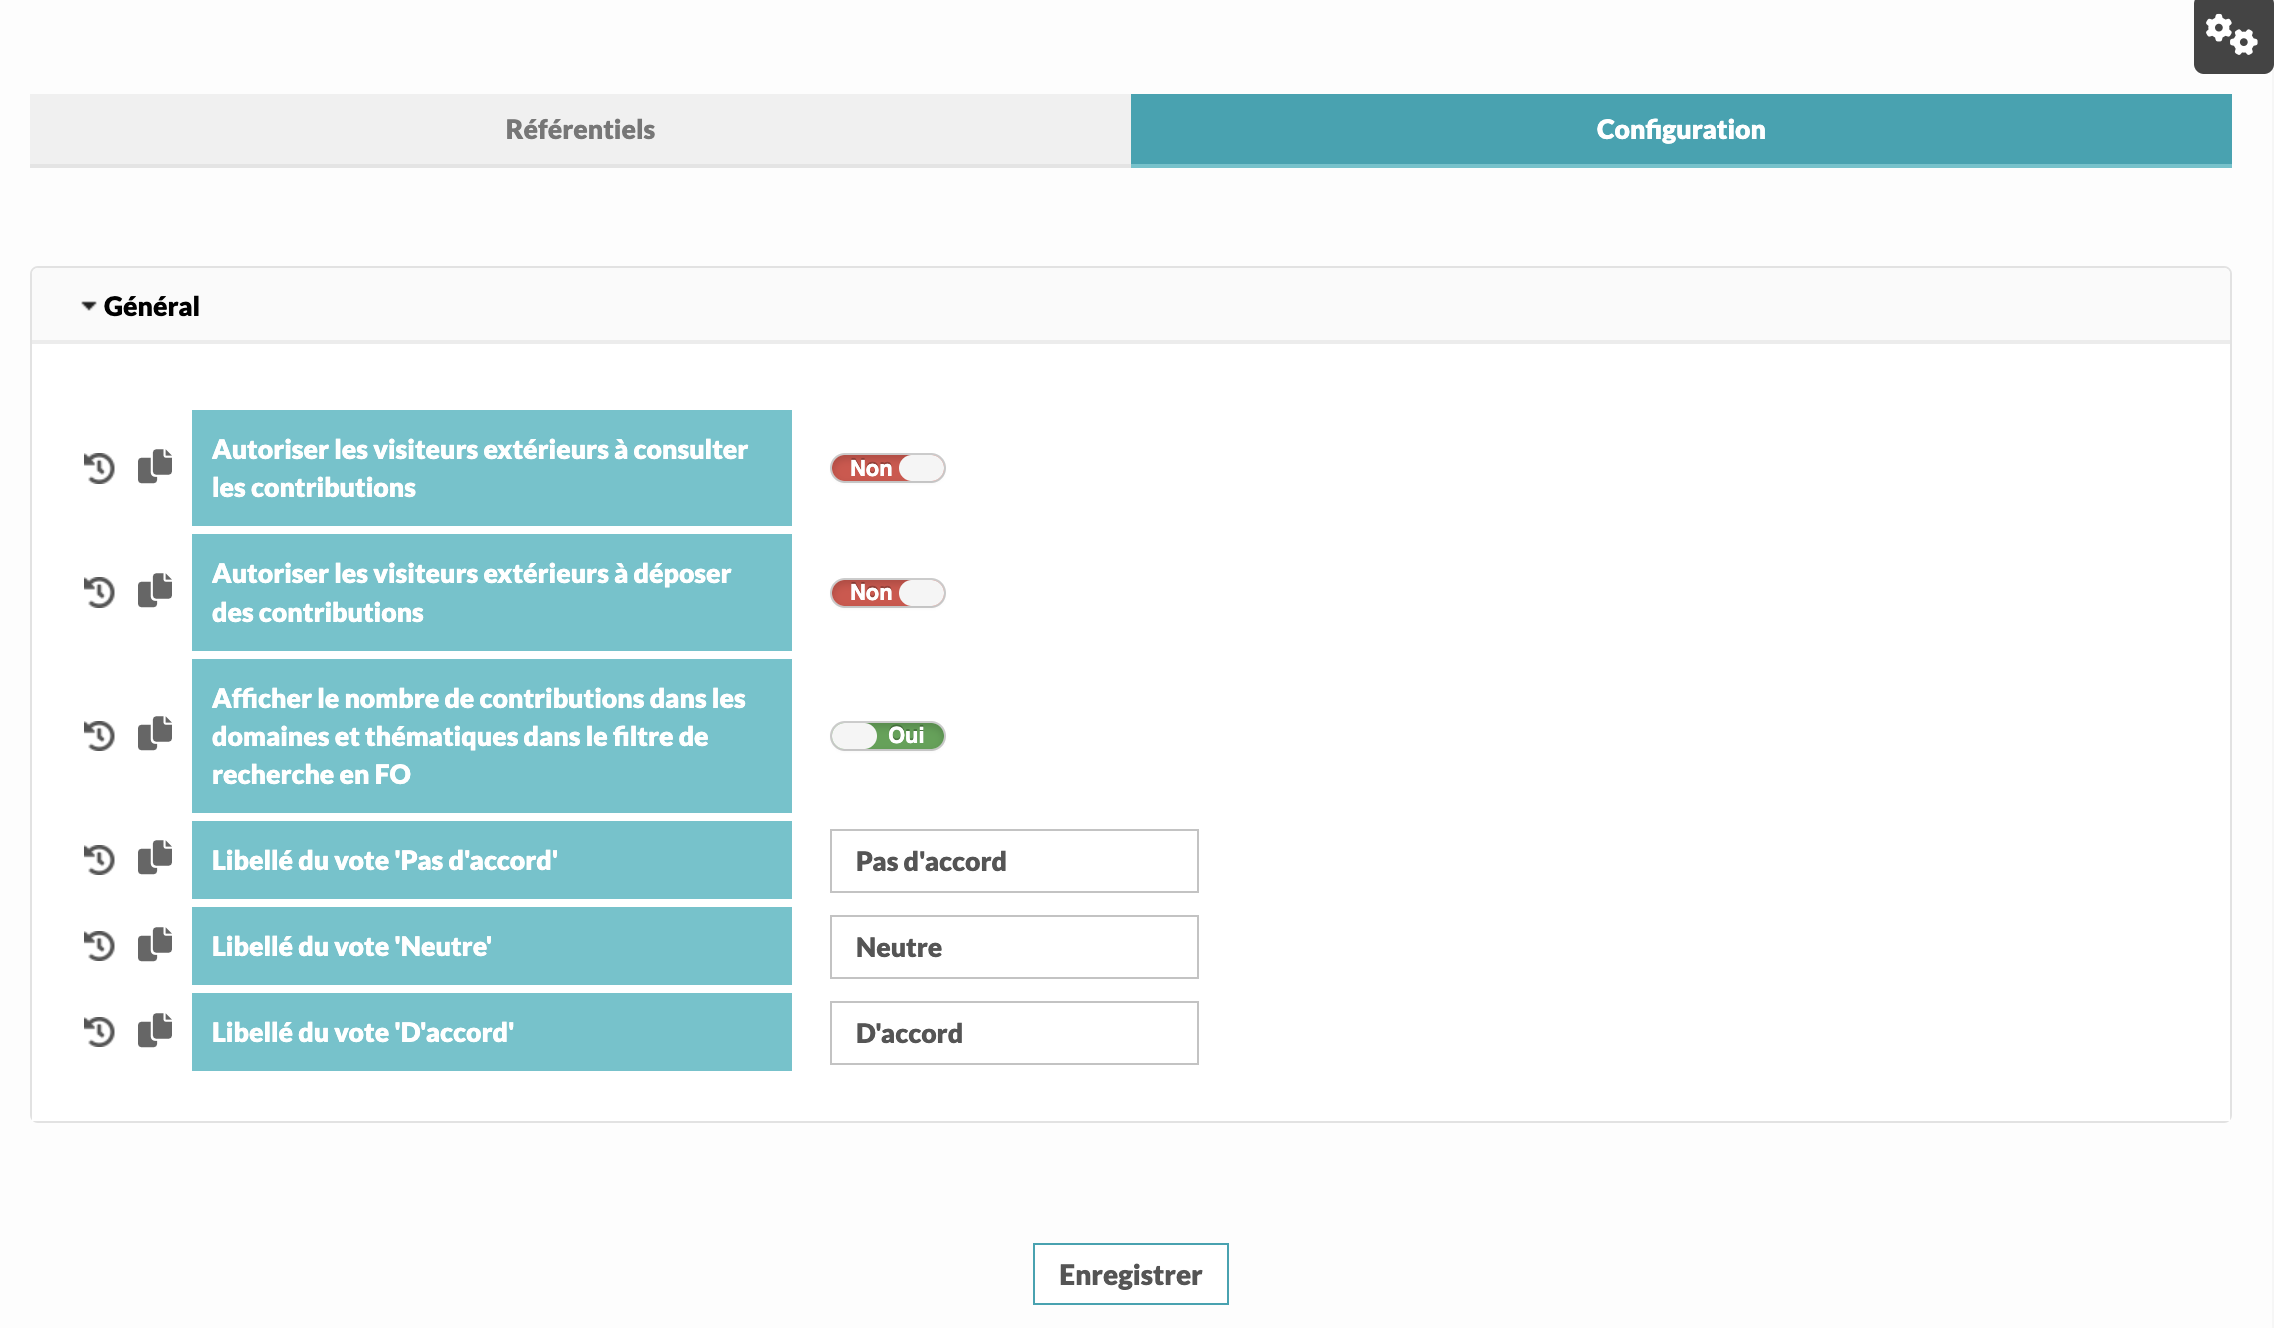
1.3.3 Adding and changing vote labels
If you want to add or change the labels of the different smileys for the votes, select "Votes" and then fill in the label of the type of vote you want to add.

1.4. Configuring the module
There are several general parameters available for managing contributions in the front office. To see them, click on " Configuration".
Once you have defined your settings and configuration, go to Contributions > Validation > View contributions.
Once your settings and configuration are done, go to the Contributions > Validation > View Contributions tab.
2. Viewing contributions
In this tab, you will be able to manage all the contributions made by your members.
You can choose between several options :

View the member's contribution

Modify the member's contribution

Send a confirmation email to the member to inform him/her/they the contribution has been validated
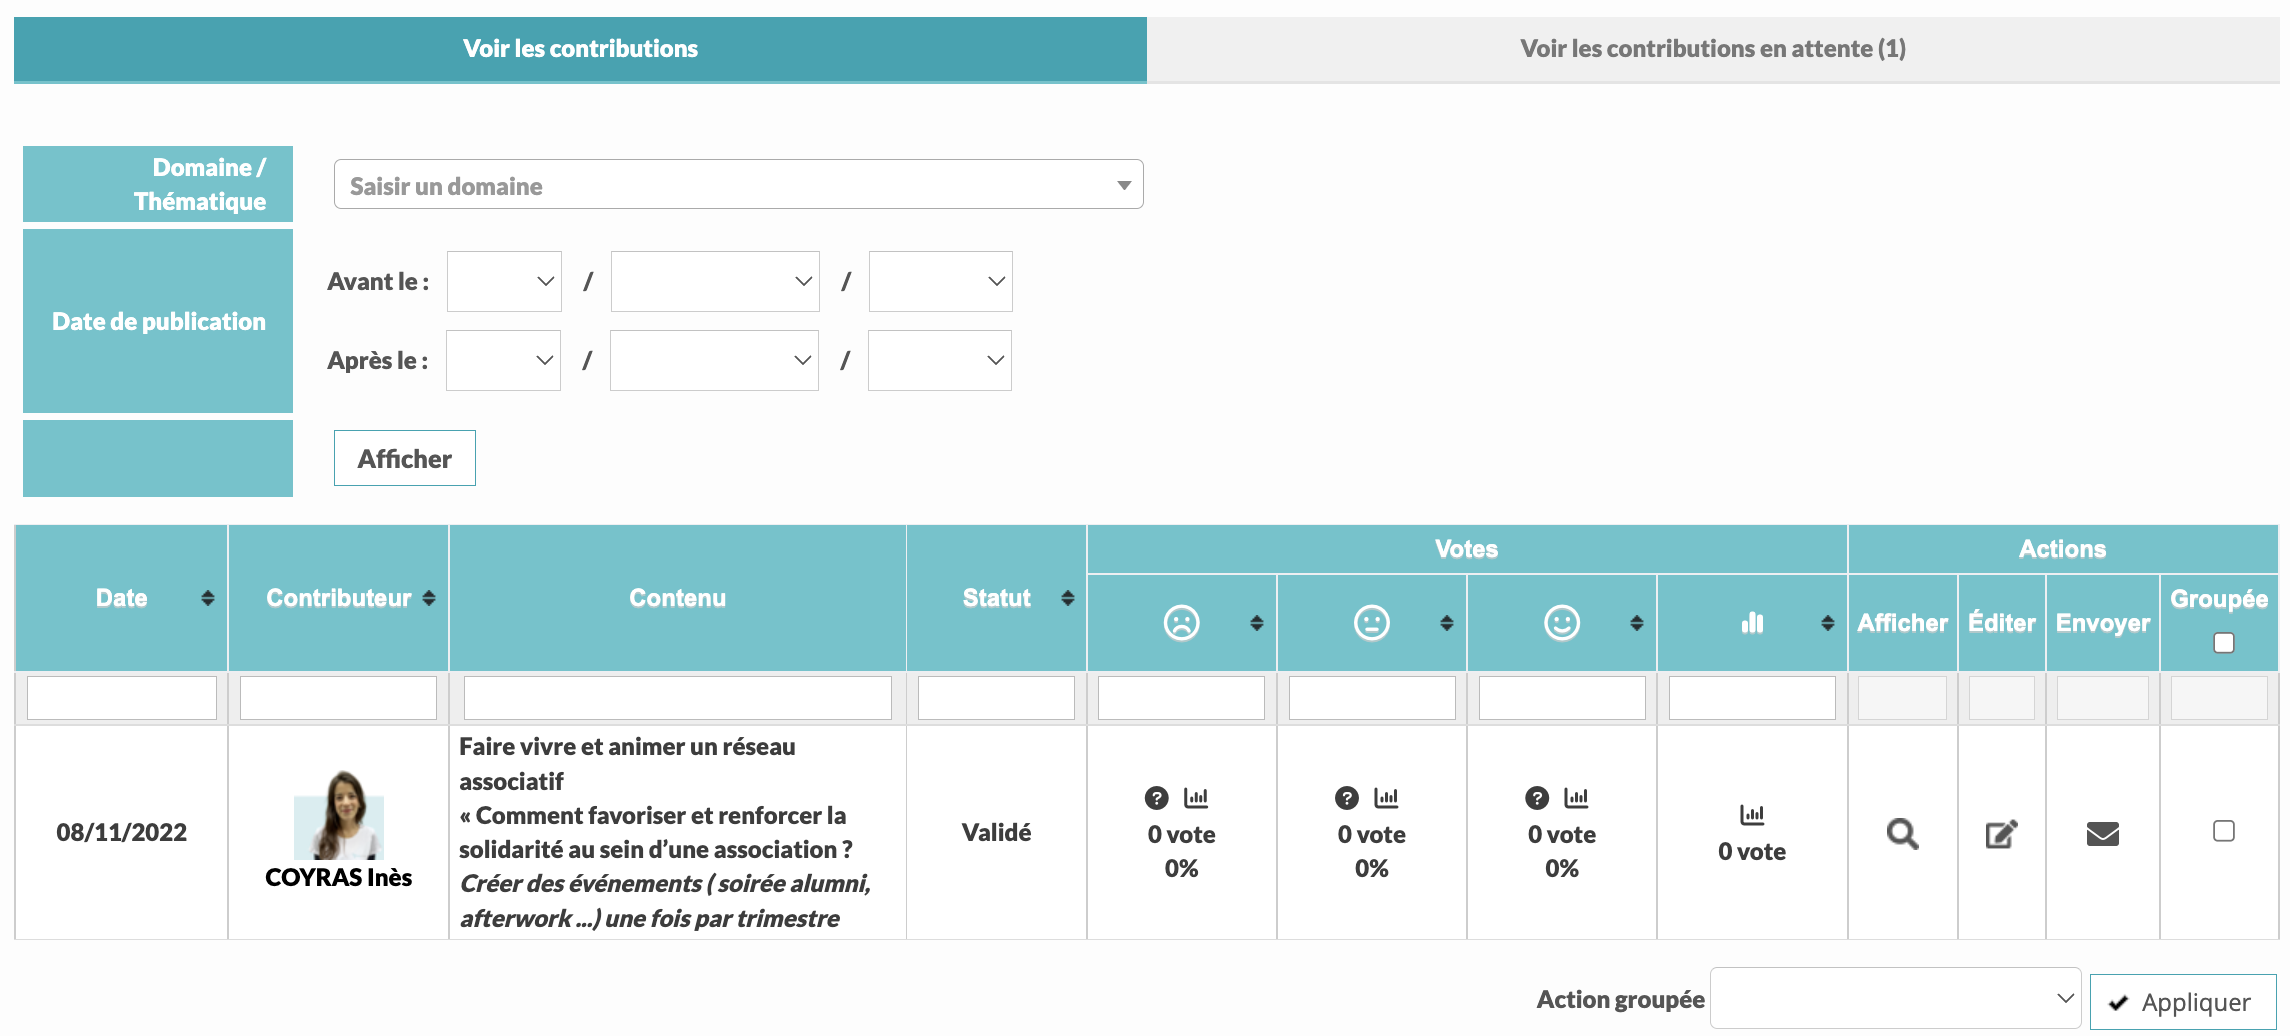
In the voting column, you can see the statistics regarding the votes of each contribution. By hovering your mouse over the "?" icon you can see the details of each vote.
The search engine at the top of the page allows you to search for a specific domain or topic according to the status and date of each entry.
3. Validate new contributions from your members
To view and validate your members' contributions, click on the "View pending contributions" tab
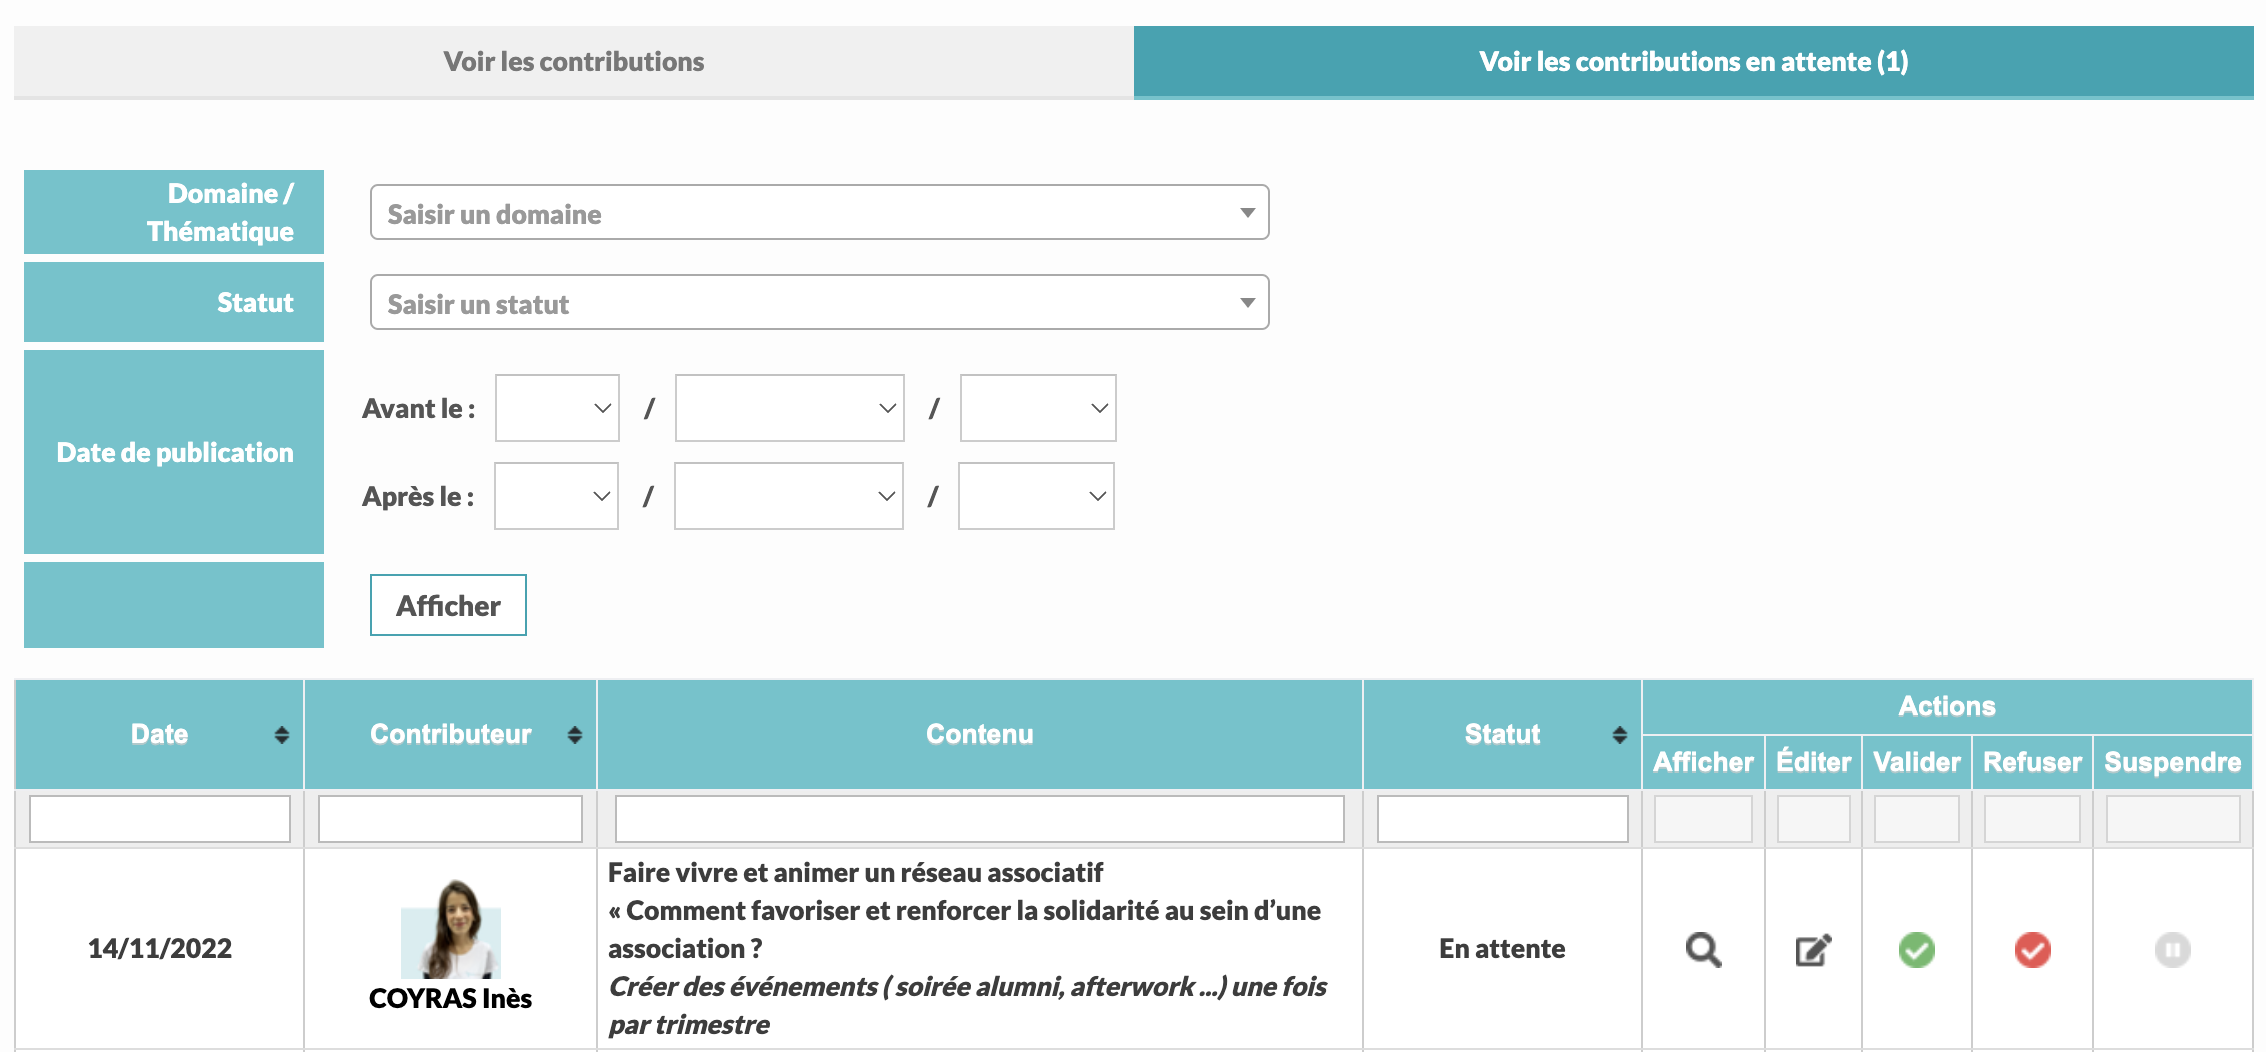
You can then:

View the member's contribution

Modify the member's contribution

Reject the member's contribution (it will not be visible on the website). The member will then receive an email to inform him/her/they of the refusal of the contribution).

Validate the submission of the member (it will then be visible on the website)

Put the contribution submitted by the member on hold at any time (it will no longer be visible on the website, but it will remain in the back office and you will be able to put it back online by validating the contribution again)
You can also search for a specific domain and a specific topic via the search engine above.
4. Viewing contributions and voting in the front office
Once the contributions have been validated, they will appear in the "Discover the contributions" tab.
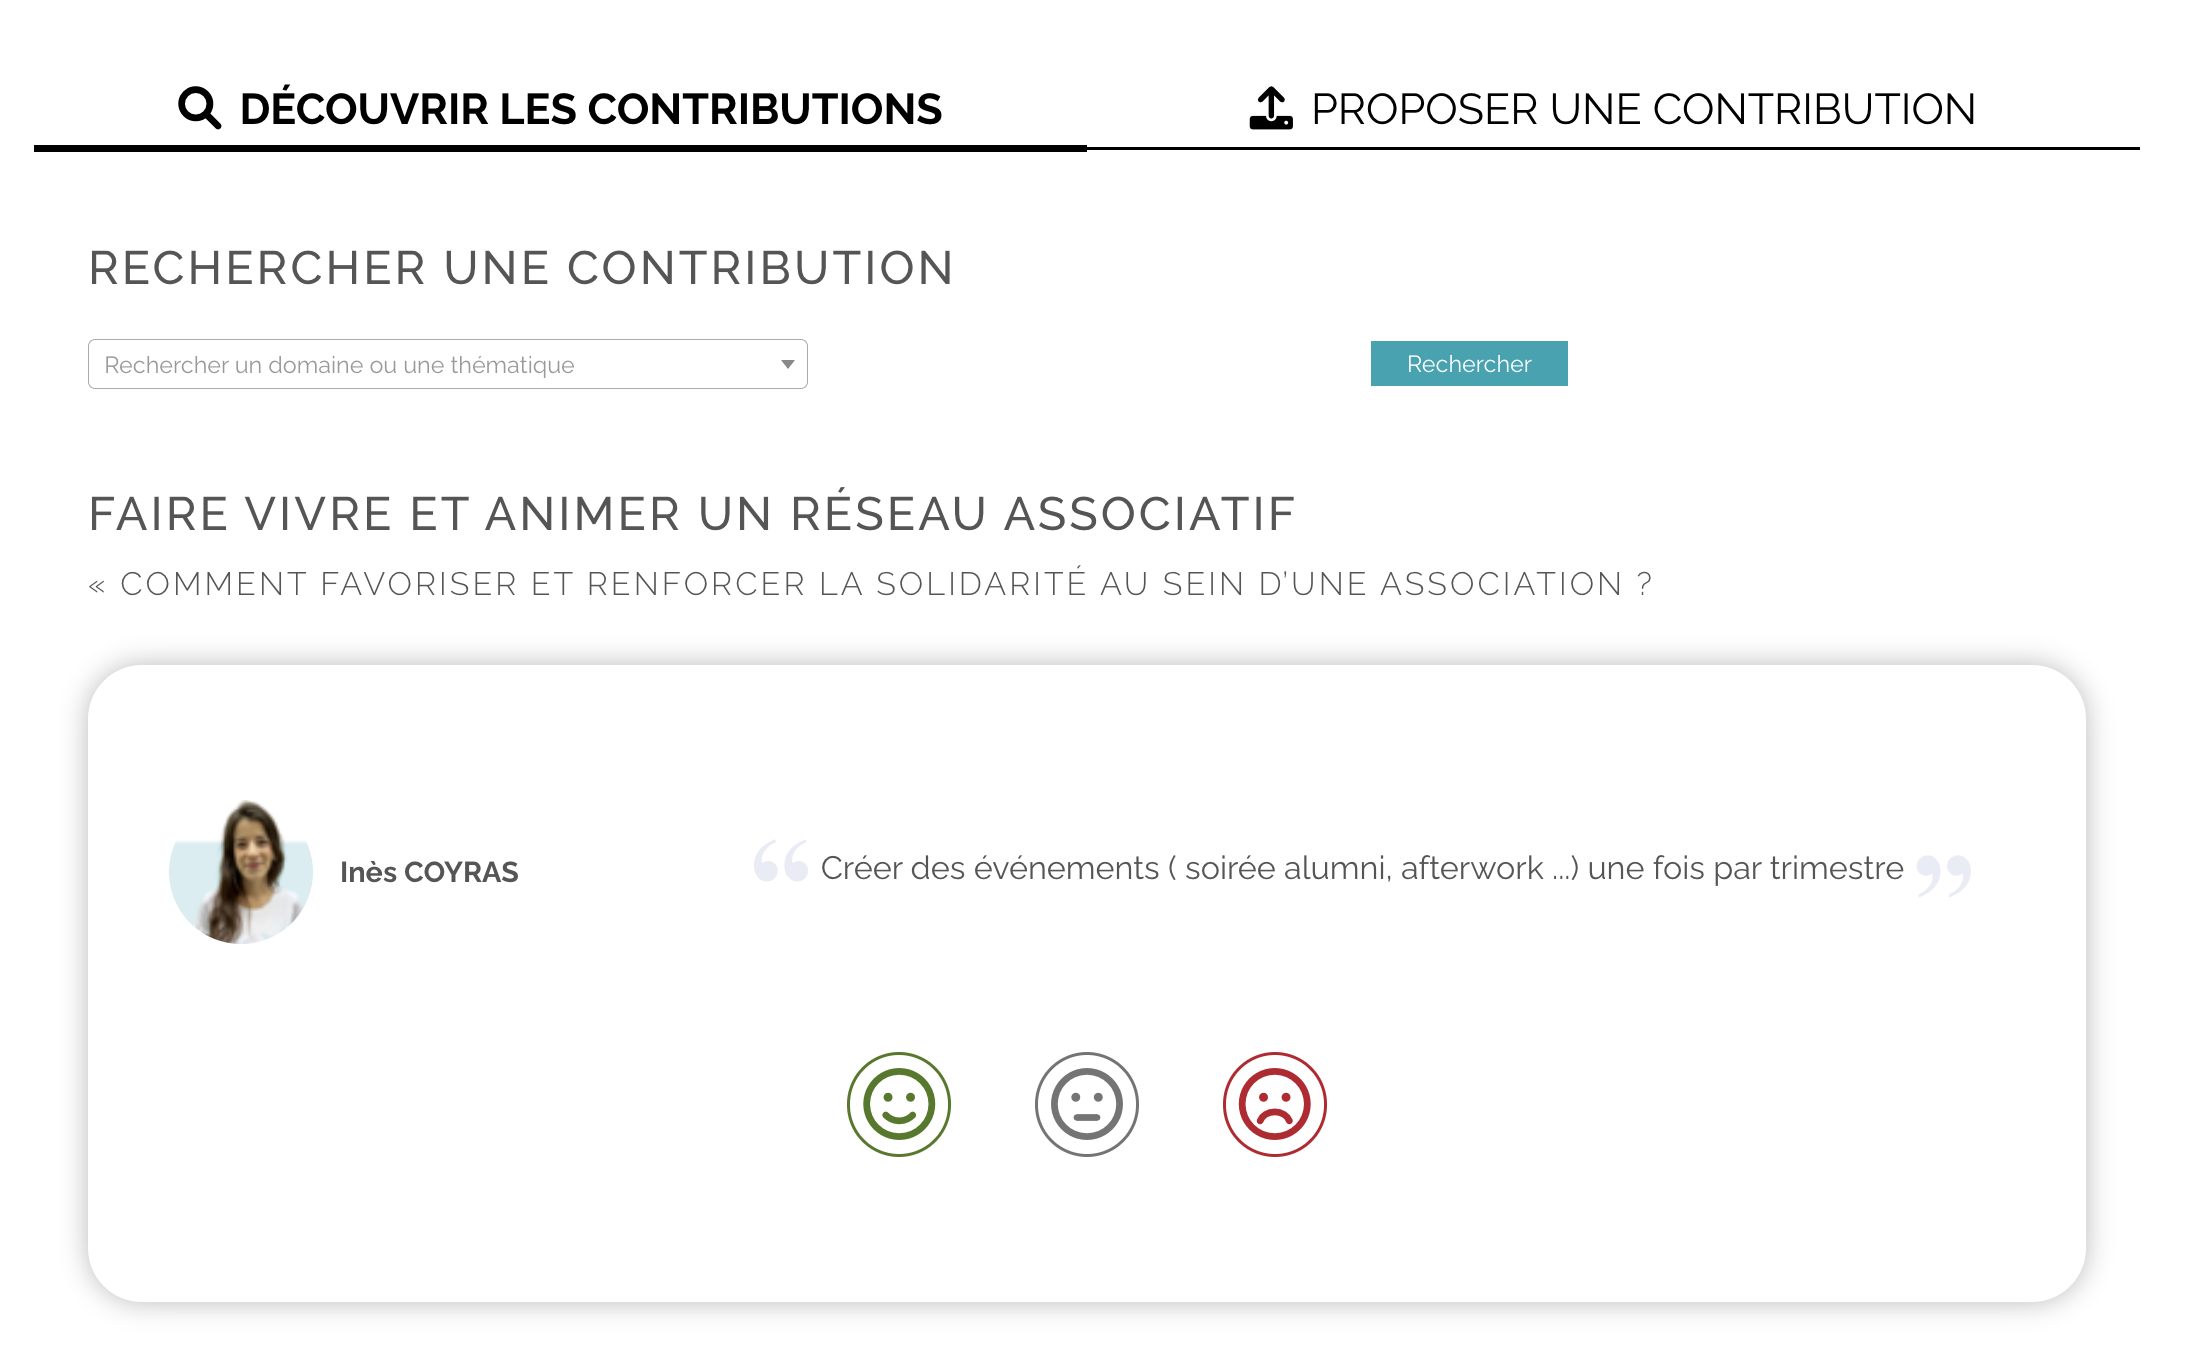
Your members can then vote for the proposals by clicking on the relevant smiley

= agreed

= no opinion

= disagree
The titles of the smileys can be configured in the back office in the same way as the fields and themes in Publications > Contributions > Settings.
5. Submitting a contribution in the front office
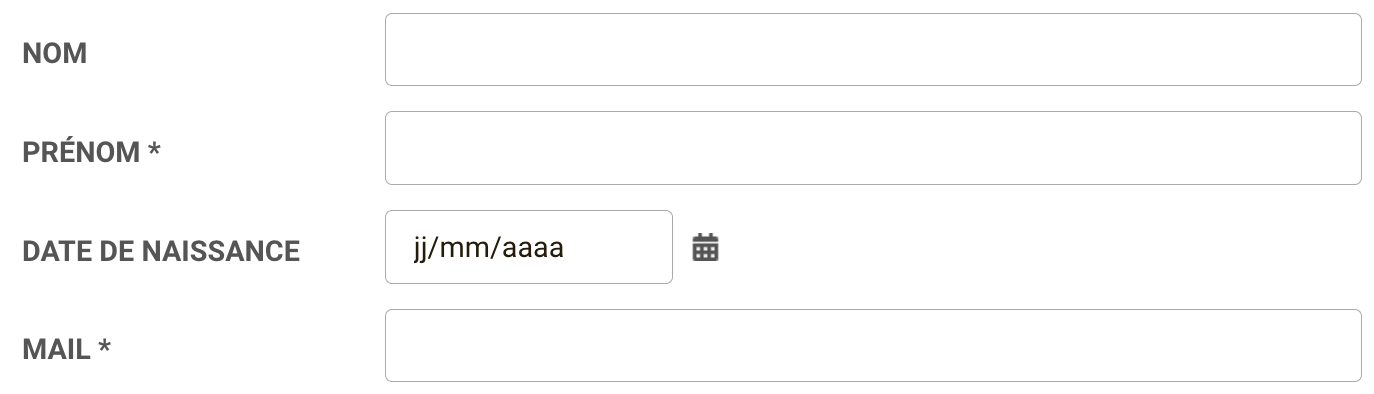
To submit a contribution, click on the "submit a contribution" tab. Choose the relevant topic, enter your contribution, and click on "validate".

If the person submitting a contribution cannot be identified or is not one of your members, some additional fields will be required, such as a surname, first name, date of birth, and e-mail address.
Please note that all contributions posted on the website are subject to validation by an administrator.
Once the member's request has been validated, he/she/they will receive a confirmation e-mail and users will be able to vote for it.
We also suggest you watch our "contributions" module to learn more.


No comment
Log in to post comment. Log in.